Smoking A Brisket (Step-by-Step Recipe Guide & Tips)
This recipe for smoking a brisket includes all the best research, experience and tips by guest chef Bob to get you to a tender, mouth-watering smoked brisket.
We include a great shortcut with step-by-step instructions and photos that even a novice can follow.
First, let me introduce our guest chef, Bob Goodman. Bob is not actually a chef, but he is an avid, passionate meat smoker. I trust him implicitly with gathering the best information out there. Why? Because Bob is a nuclear engineer who relishes research, science and detail – not just in theory, but in practice. He has experimented with briskets for a long time and recently threw a smoked brisket party with his wife, Faygie, to share an amazing feast.
Bob patiently helped me break down the steps and critical information, including the equipment needed, in laymen’s language. I am an avid griller, but I knew nothing about how to smoke a brisket in a smoker. Now I do.
There is no one way to smoke a brisket. All I know is that this way works. Rave reviews from 24 guests.
Bottom line: The smoked cooking method does take some practice and trial and error to achieve the tastes you want. And smoking brisket is a long process. But if you’re patient, the end result will be a mouthwatering, smoky, delicious, juicy brisket.
Ingredients – tailored to your taste
Brisket
Grade: Try to buy at least the Choice cut of brisket (AAA in Canada). Prime is even better. American Wagyu even better. The more marbled, the more exceptional the piece of meat, and Wagyu beef has that in spades (although considerably more expensive). Find more details in this video by Aaron Franklin on buying and preparing a smoked brisket.
Cut: Experts suggest buying a whole packer brisket which includes both the fattier point part (also called the Deckle) and the leaner flat part. I’m a fat-loving gal so I much prefer the juicier softer textured point. It’s all personal preference – you can buy just the leaner flat or the point (although the point is harder to find as a separate piece).
Step by step instructions – and tips
This is an overview of the steps with tips and pictures. The cooking process with more specific how-to details are also in the recipe card below.
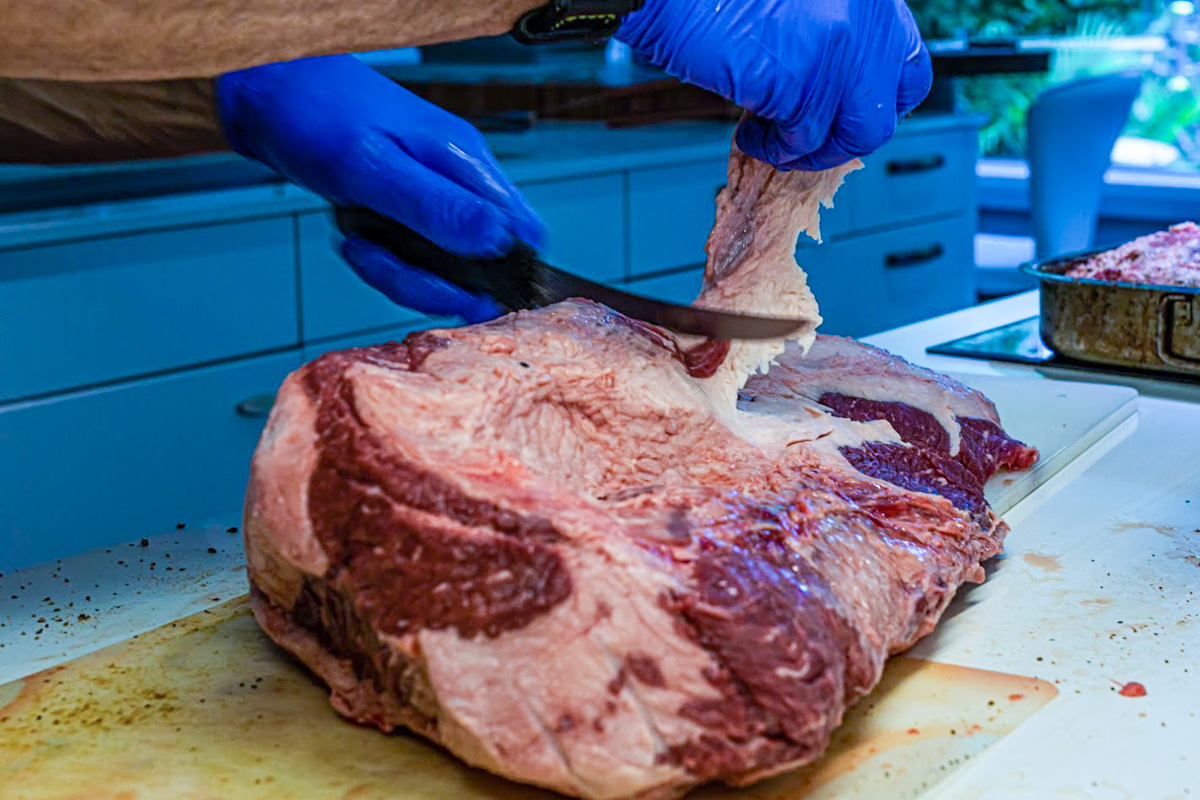
Trim and season the brisket (night before)
How to trim brisket: A full brisket comes with a heavy layer of fat. Trim the excess fat (with a sharp boning knife if you have one) leaving about 1/4 inch/0.63 cm. This will allow the smoke to penetrate and add a level of moisture and flavor. There’s a big chunk of fat between the point and the flat part of the brisket – the fat cap. You can cut that out. Trimming can take 20-30 minutes. Or save the time and ask the butcher to do it. Many stores sell briskets already trimmed.
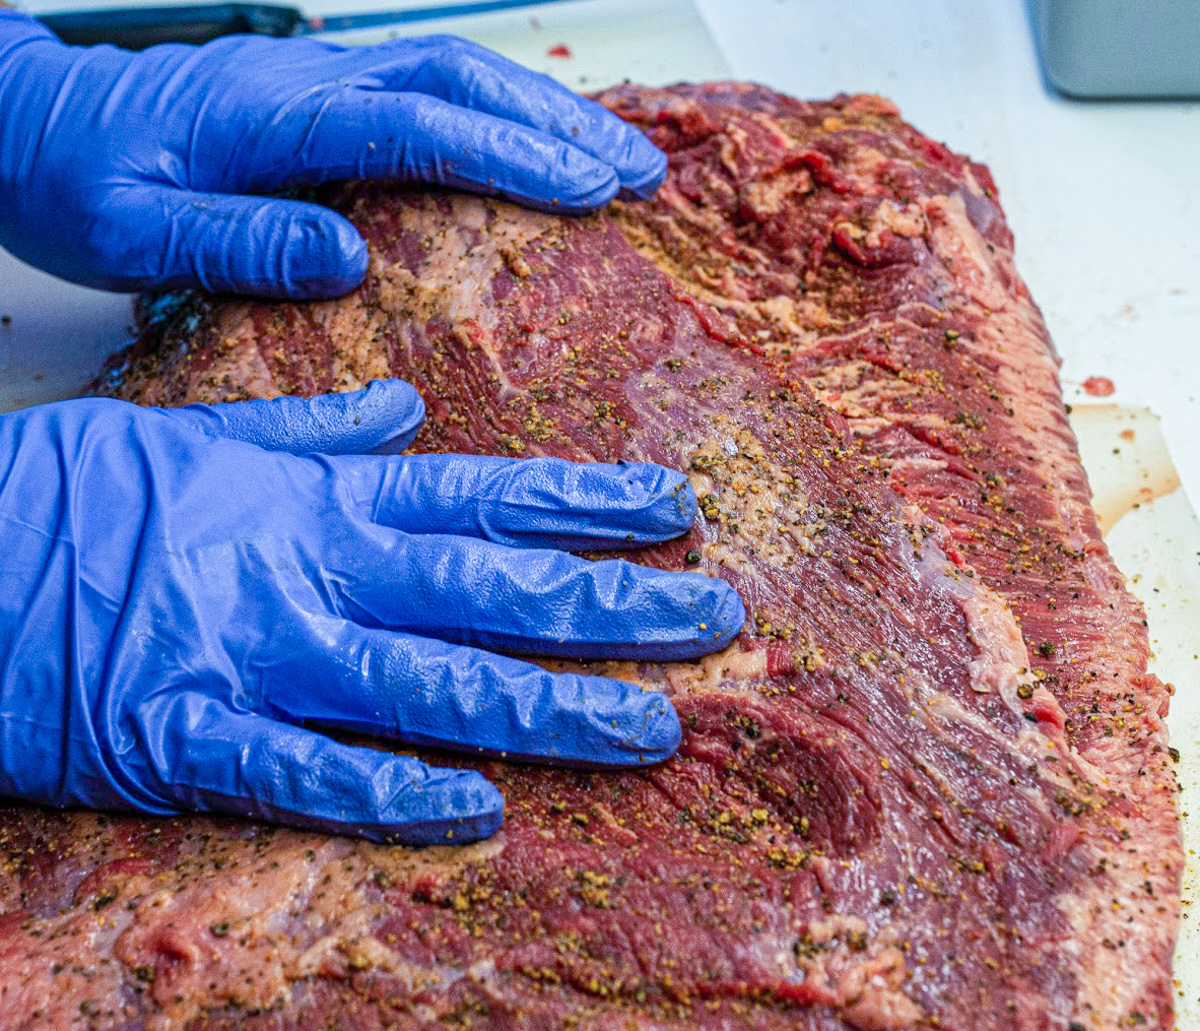
How to season brisket: Bob and many experts believe the flavor of the beef should speak for itself so seasoning should be kept simple and light. Salt and pepper are the key. Garlic powder and onion powder are optional. You can, of course, use a favorite dry rub if you prefer. It is not necessary to inject the meat with broth as they do in competitions. Season the entire brisket the evening before smoking and keep the brisket in the fridge overnight, uncovered. This is called dry brining.
TIP: To help with more even cooking, bring the brisket to room temperature by setting it on the counter for an hour or two if you have time.
Prepare the smoker and equipment (early next morning)
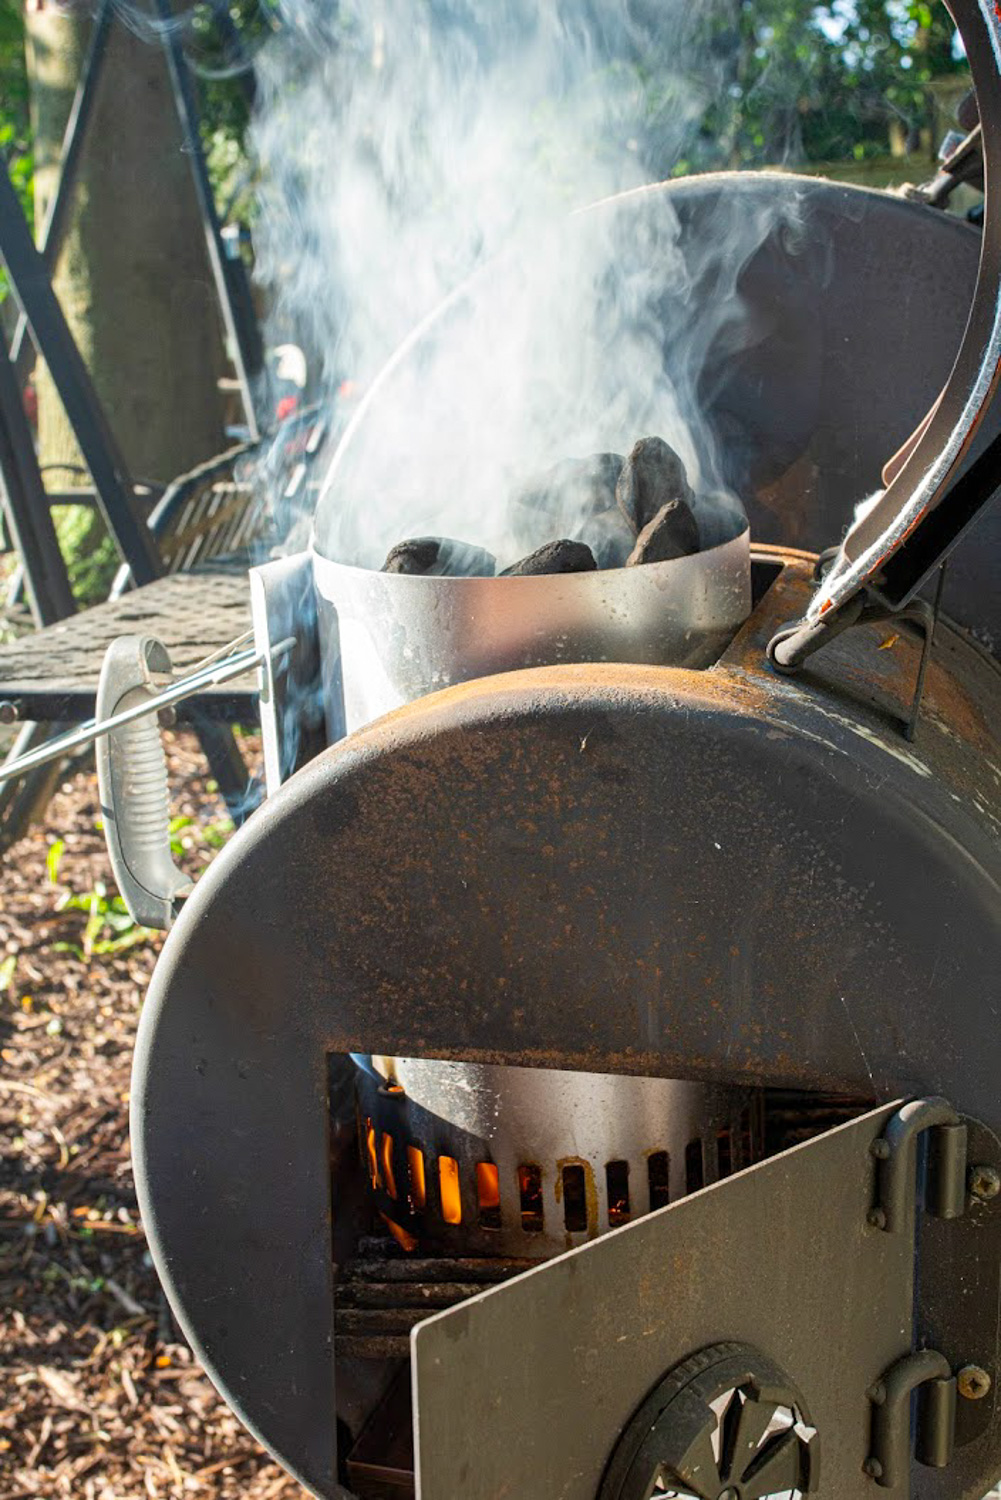
Smoker
- The smoker can take up to 45 minutes to heat to the desired temperature of 250F/121C. Follow the directions on your smoker to prepare for smoking.
- Types of smokers:
- Heavy cast iron Broil King Smoke XL Offset Smoker. Pros call this an “Offset Stick Burner”. Bob prefers this type of smoker because of the heavy nature of the metal that holds the heat and maintains the temperature much steadier.
- Electric pellet smokers are more convenient as they have temperature controls, but the temperatures don’t stay as steady. Maintaining a steady cooking temperature is important.
- TIP: Here’s a good article on how to season a charcoal grill in 10 easy steps.
Briquettes and Wood
- You will need 1-2 bags of charcoal briquettes to create the heat source if using an offset stick burner smoker as well as wood to create the smoke flavor.
- TIPS: Use wood chips of oak, cherry, apple, maple or hickory wood for flavor. Don’t use mesquite because it’s too overpowering for this purpose. And do not soak the wood.
Probes
- You will need to set up your probes to monitor the temperature of the smoker and the brisket. Ideally, the probes will have cables that can come out of the smoker, allowing you to keep the lid closed as much as possible.
- Typically the heat monitor that is attached to a smoker is not accurate. The best way is to use a temperature probe that can be clipped just above the grate to monitor the temperature of the smoker.
- If you don’t have a probe with cables to monitor the meat temperature, you can use an instant read thermometer.
Smoking the brisket (cooking step 1)
Smoking the brisket is the longest part of the process – about 5-7 hours depending on the size of your brisket.
The brisket will be fully cooked at 195F-205F (90C-96C). You can fully cook it in the smoker or use the shortcut Texas Crutch method which includes part smoker, part oven.
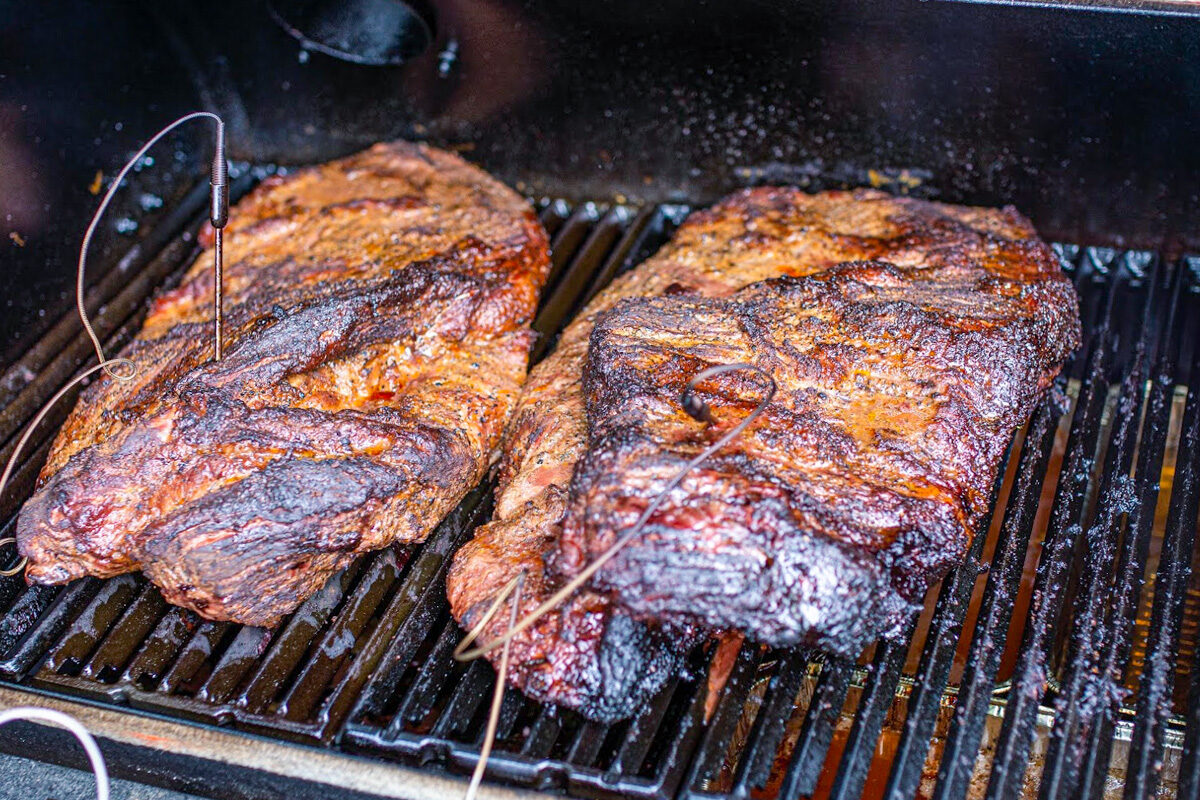
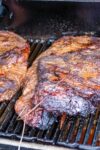
- Place the brisket fat side down on the grate in the smoker to create a barrier between the fire and the meat. (some say this doesn’t matter). Avoid opening and closing the lid on the smoker too often because the smoker’s temperature will lower quickly.
- Insert the meat probes into the thickest part of the brisket. Place a pan of water under the smoker grating to keep the meat from drying out.
- Add 2-3 chunks of wood every 30-45 minutes, depending on how smoky you want your brisket;
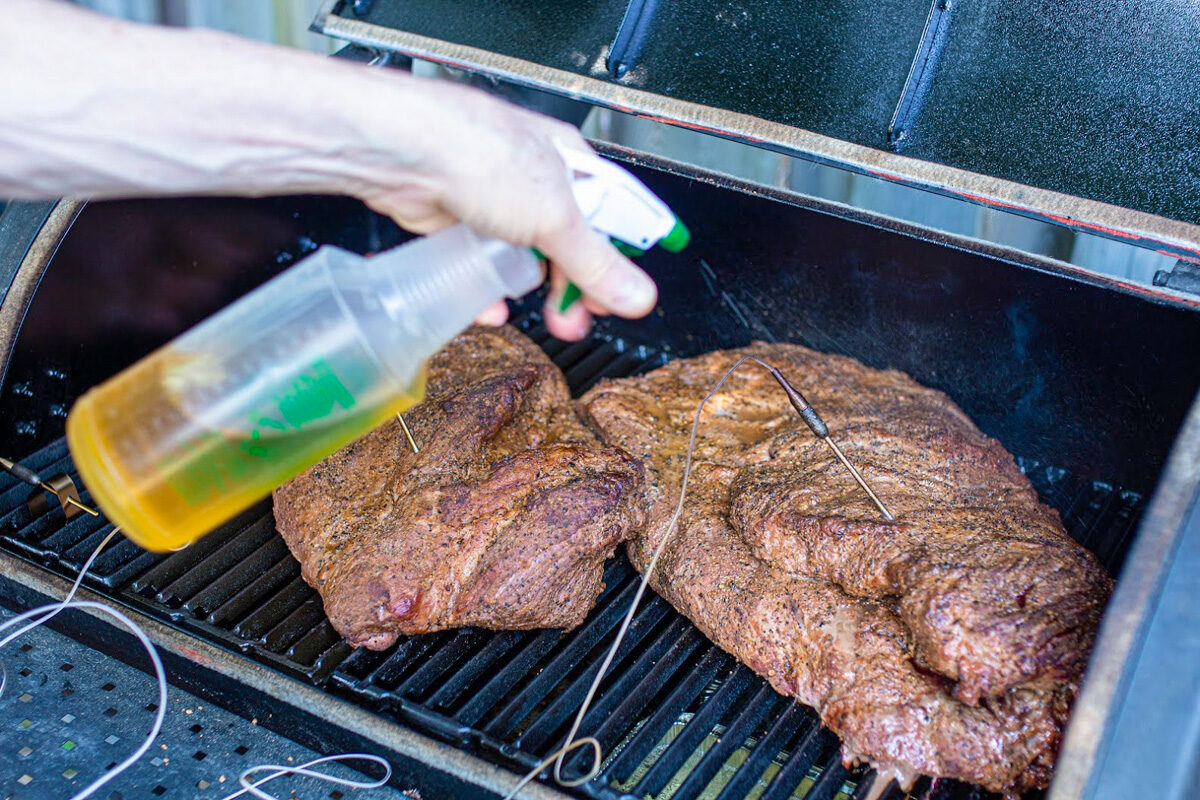
- Spray the brisket with apple juice (optional) to keep the surface moist and allow better smoke absorption.
- Monitor the smoker temperature probe to maintain the heat between 230F and 250F (110-121C), adding charcoal briquettes as needed and opening and closing the dampers as needed.
- Monitor the meat temperature with a probe (or instant-read thermometer).
Shortcut Tip:
To reduce the total cooking time by up to several hours, Bob suggests using the Texas Crutch (“wrap”) method. This means taking the brisket off the smoker when partially cooked, wrapping it in foil and finishing it in the oven.
Instead of the oven, you can continue cooking in the smoker. Just increase the smoker temp to 300F and place the wrapped brisket back in the smoker until it reaches 195F. Bob uses the Texas Crutch/oven method because, by then, he needs to rest and not fuss anymore!
Transfer the brisket to oven (cooking step 2)
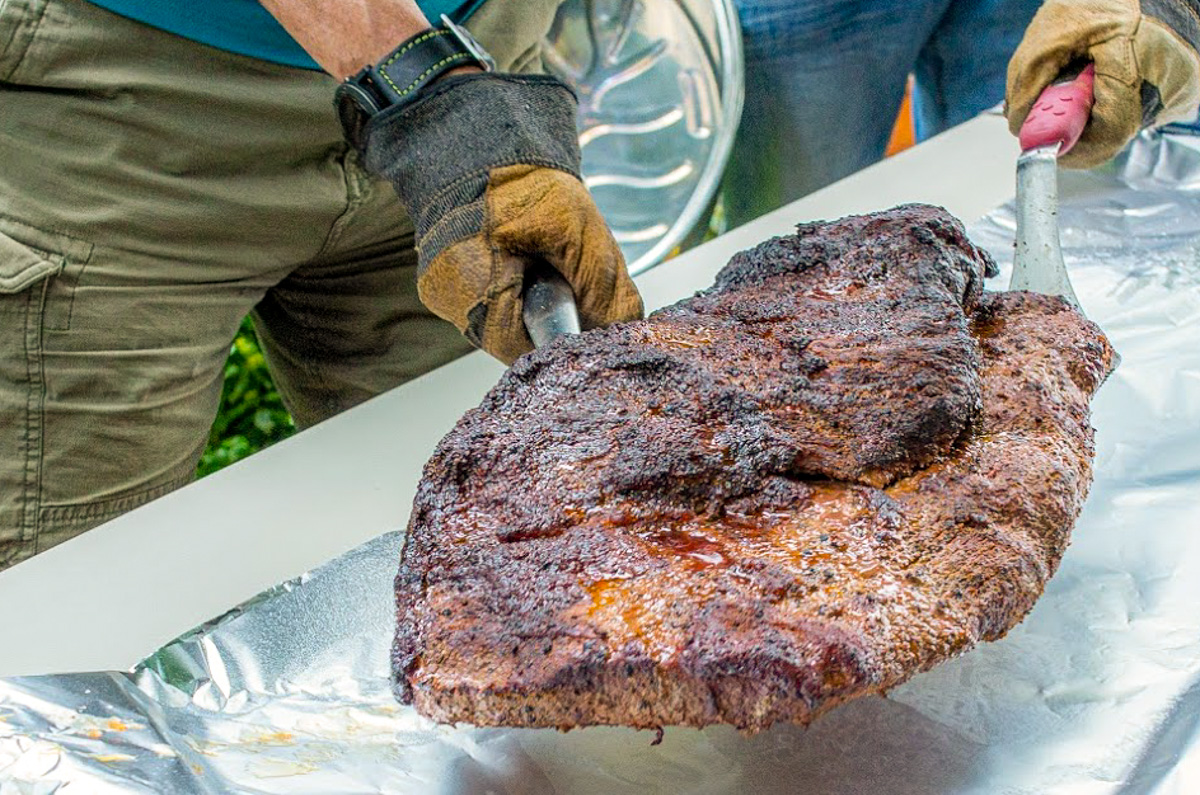
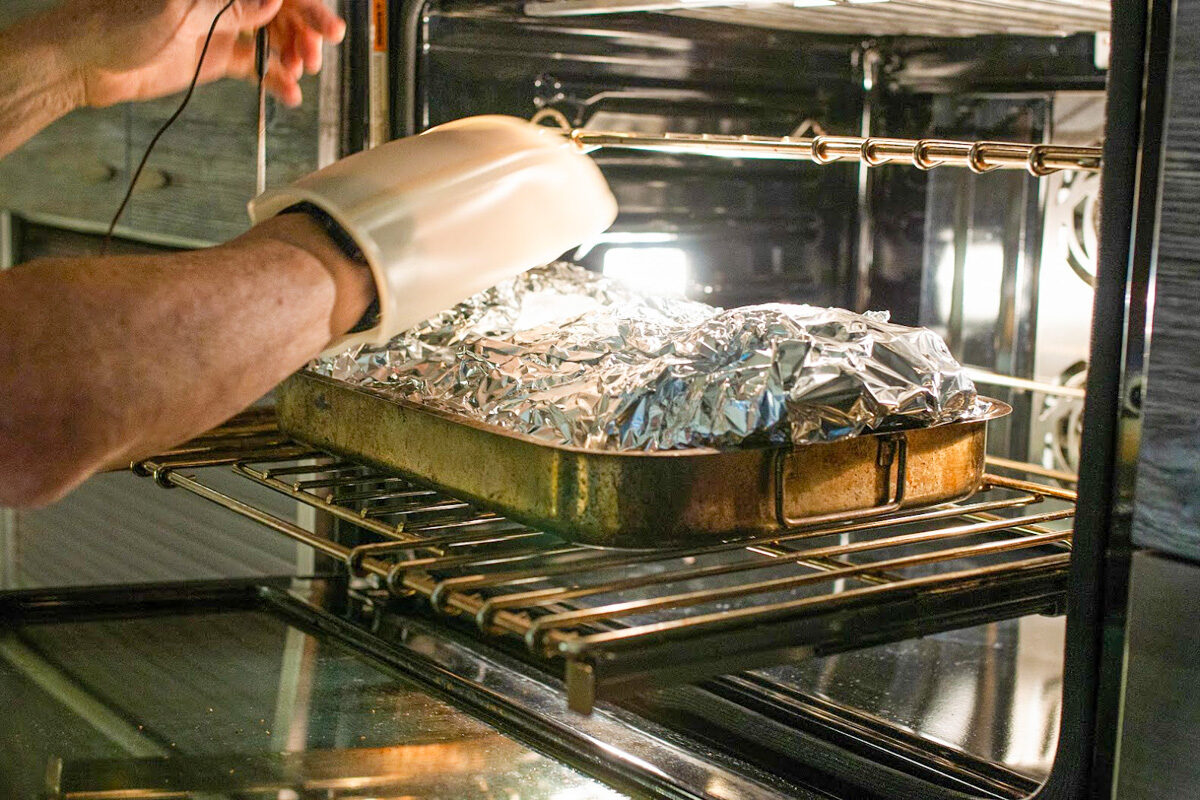
Using the suggested Texas Crutch method to shorten the cooking time, remove the brisket when its temperature “stalls”. This is when the internal temperature of the meat stays steady for a long time and no longer rises, typically somewhere between 150F and 160F (65.6-71C) depending on the meat.
Wrap brisket tightly in foil or good quality pink butcher paper, then transfer it to a roasting pan to a 300F/149C oven to cook for about 3 hours, letting the fat fully render.
Rest the brisket
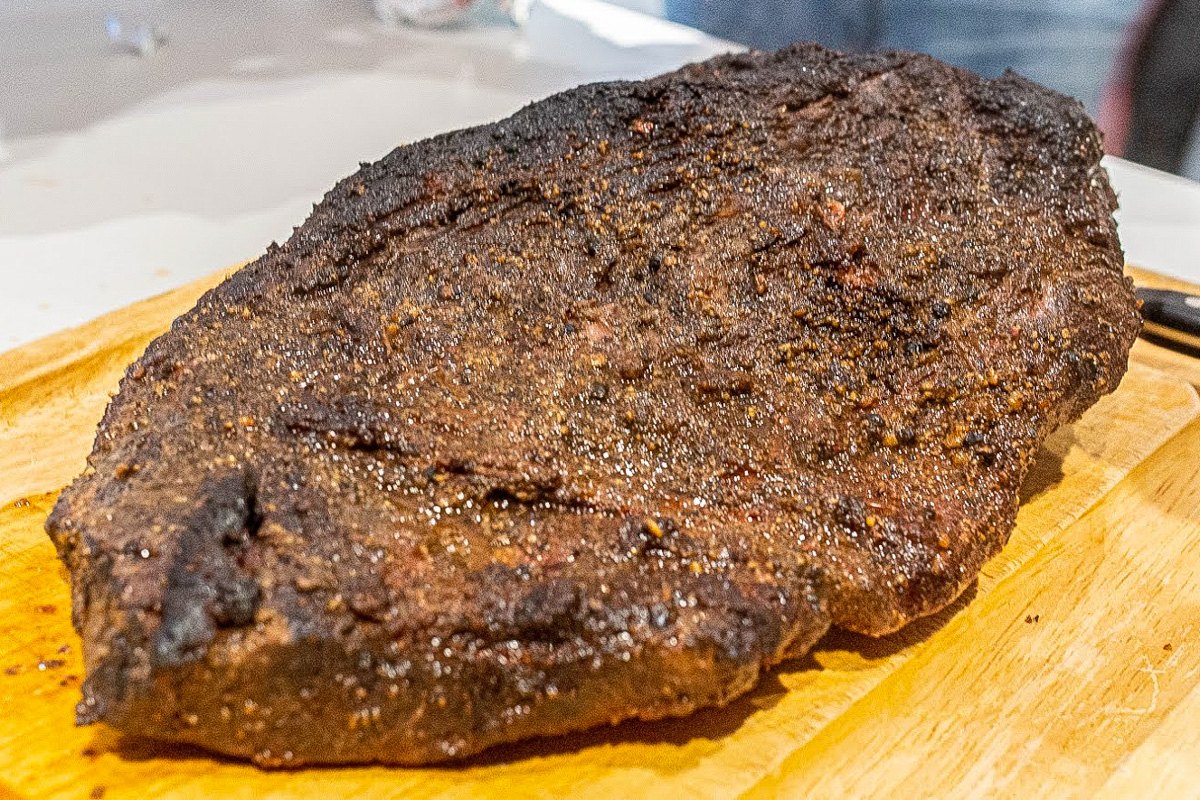
Very important! Let the brisket rest for an hour (or if large, for 90 minutes), wrapped in foil, ideally in a cooler to maintain its temperature and allow the juices to return to the center of the meat. The cooler will keep the smoked beef brisket hot for 5-6 hours if needed.
Tip: If you don’t have a cooler, let it sit on the counter, well covered in foil for 60-90 minutes.
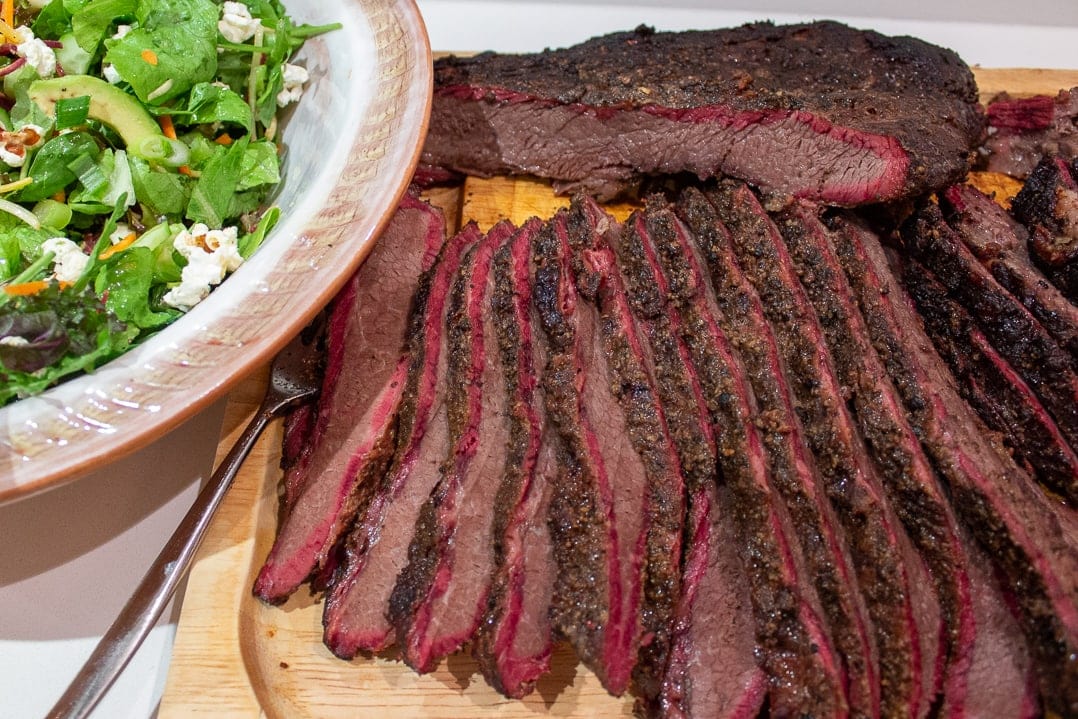
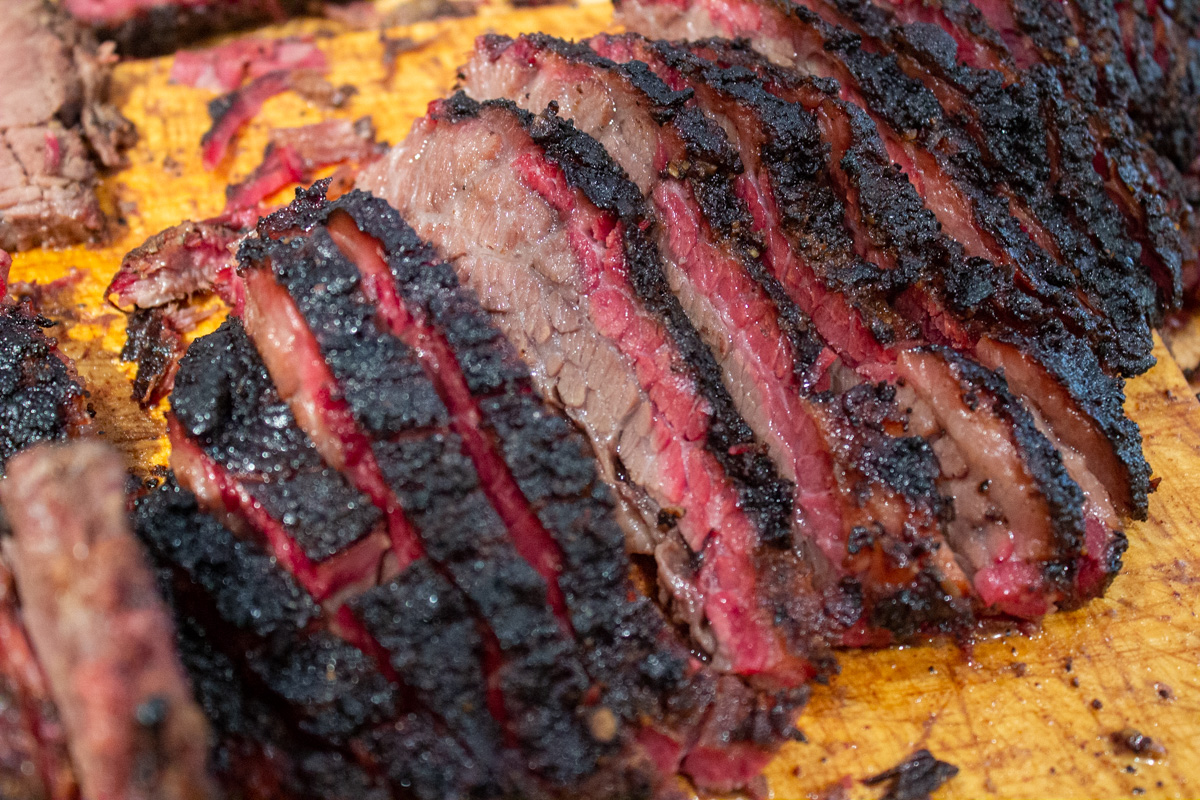
Slice and dig in
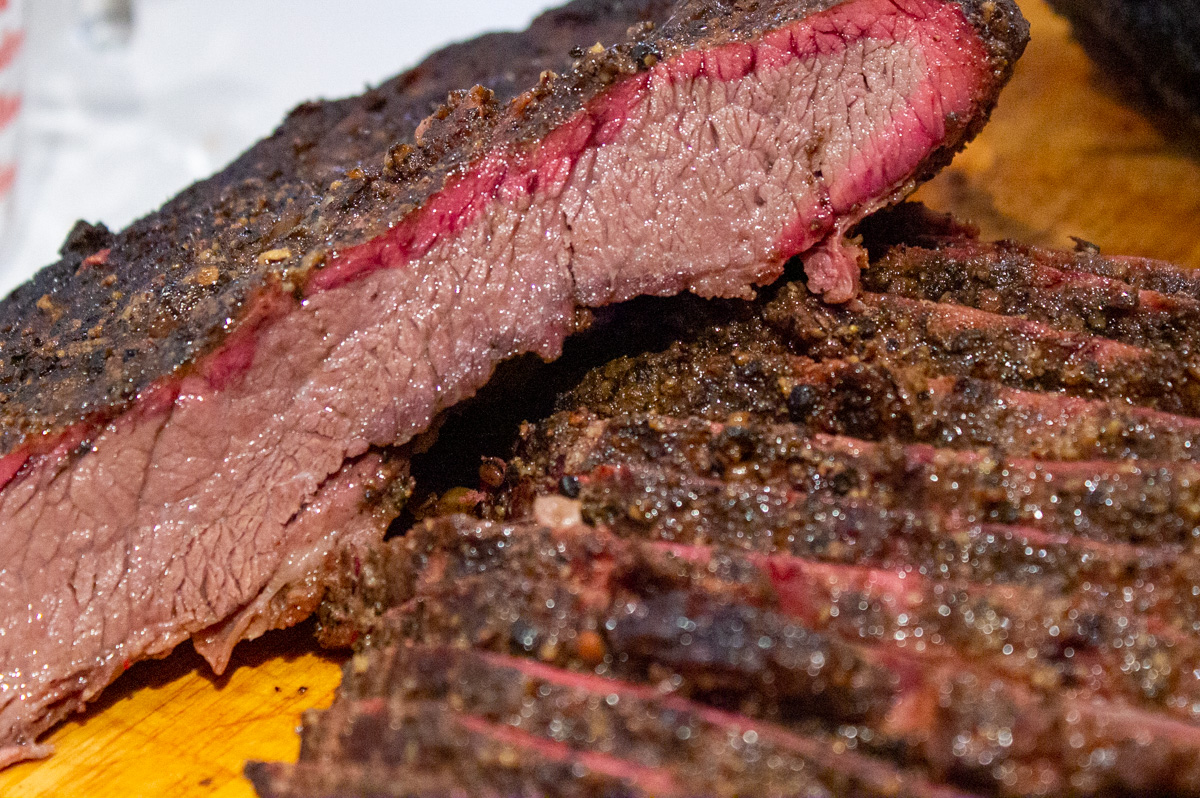
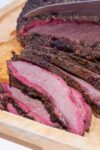
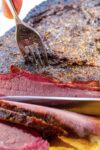
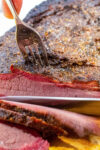
Time for the big reveal! Place the brisket on a cutting board and slice it across (perpendicular to) the grain into 1/4 inch (1.3 cm) thick slices.
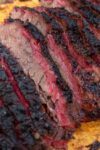
You can slice off the fattier point section first and cut that separately if you prefer. You will notice a beautiful pink smoke ring around the edges. Now you know how to smoke a brisket in a smoker. Time to dig in and enjoy the best smoked brisket ever!
Brisket FAQs
Brisket is beef cut from the breast of a cow. It is a tough cut of meat that requires long braising, sous vide cooking or smoking to become tender. While it is still one of the cheaper cuts of beef, it shrinks considerably and costs more when sold fully trimmed at the grocery store. A full packer brisket is made up of two portions – the brisket flat (leaner portion) and the brisket point (fattier portion).
A smoker (offset stick burner or electric pellet grill), charcoal briquettes, wood, temperature probes (ideally with cables, but an instant read thermometer will do as well), a good trimming knife (to trim fat) and a carving knife. A chimney starter is optional but a much quicker (and cleaner) way to light the briquettes.
Prime cut is best (or waygu, but extremely expensive). Choice cut will also work well, but not as tender and juicy as it is less marbled. Buy a ‘whole packer brisket’ which includes the fattier point cut and leaner flat cut.
The entire process from start to finish takes about 20-24 hours including trimming, seasoning, smoking, oven cooking and resting. The general rule of thumb is about 60-90 minutes per pound. It’s best to go by the internal temperature of the brisket as read by the probe or meat thermometer.
With leftover brisket you can make tacos, shredded brisket with BBQ sauce, brisket sandwiches, brisket shepherd’s pie (shred the meat), brisket quesadilla, brisket in onion gravy, Philly cheese steak, vegetable beef barley soup.
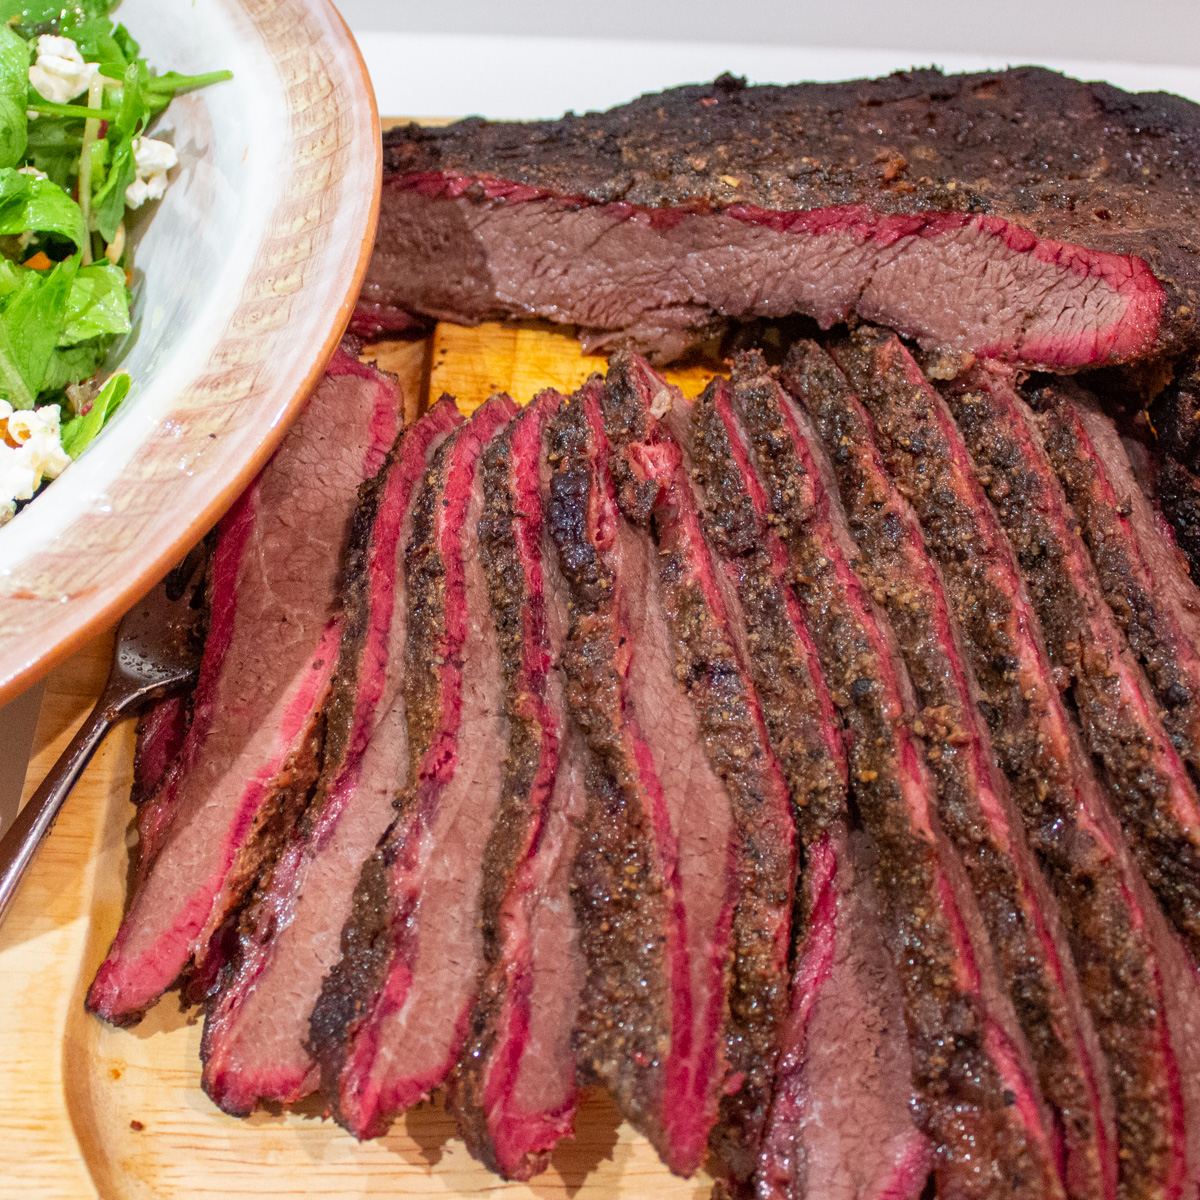
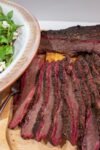
What to serve with this smoked brisket recipe
The brisket party was potluck. Here are some great sides that were served at the party: Herb Potato Salad, Grilled Carrots with Balsamic Glaze, Party Salad with Grilled Vegetables and Quinoa, several other salads, coleslaw, pickles, homemade rolls and some good Henry McKenna bourbon.
Make ahead
- The brisket can be made up to 5-6 hours ahead and kept warm, covered in foil (in an a 170F/77C oven) or in a cooler .
- Alternatively, the brisket can be made a few days ahead, sliced and served cold in sandwiches. Or, warmed in a 325F/163C oven with BBQ sauce or original juices from the meat for 20 minutes (if not sliced, it can take an hour or so). The internal temperature should be about 140F/60C.

Love smoky food but don’t have a smoker?
If you don’t have a smoker, try these recipes that get a wood-smoked flavor from cedar planks. Admittedly, not the same as using a smoker, but still delicious in a fraction of the time and effort.
- Canadian maple cedar plank salmon
- cedar planked chicken (flattened or spatchcock)
- cedar planked grilled whole chicken
- smoked chicken thighs
Please leave a 5-star rating ***** with a comment in the recipe card below if you like the recipe. Thank you so much!
Smoking a Brisket (Step by Step Recipe)
Equipment
- Smoker (an Offset Stick Burner type smoker was used for this recipe. A pellet smoker can also be used)
- Probes (that are accurate and allow continuous monitoring of smoker and meat temperatures are ideal. (Bob uses Thermoworks Signals). Ideally, use probes with cables to reduce the need to open and close the lid too often. Alternative: An instant read thermometer can be used to monitor meat temperature instead. )
- Wood (oak, cherry, apple, maple or hickory)
- Charcoal briquettes (if using an offset stick burner smoker, you will need a bag or two)
- Chimney Starter – optional. (Bob uses the Weber Rapid Fire Chimney Starter sold on Amazon).
Ingredients
- 15 pounds whole brisket, Note 1 (includes both point and flat sections)
- kosher salt and freshly ground pepper
- optional: garlic powder, onion powder
- optional: apple juice in a spray bottle
Instructions
- TRIM THE FAT (the night before serving): Trim fat off brisket using a boning knife if you have one, leaving about 1/4 inch/0.64 cm of fat on top side. Cut out most of the fat cap in the crease where the two sections of muscle (the point and the flat) are attached. Shortcut: Buy a trimmed brisket or ask the butcher to trim it.
- SEASON BRISKET (the night before serving): Season all sides of brisket evenly with salt and black pepper (and onion and/or garlic powder if using). No need to season too heavily. Place in pan. Refrigerate overnight to dry brine it (increasing flavor, moistness and tenderness).
- BRING BRISKET TO ROOM TEMPERATURE (early morning on day of serving): Sit brisket on counter for 60 minutes if you have time (for more even cooking).
- PREPARE SMOKER (early morning on day of serving): Heat smoker to 250F/121C using charcoal briquettes. Add chunks of dry wood to build smoke flavor. Set up probes (see Equipment above) to monitor temperature of smoker and brisket: Clip grating probe to sit just above smoker grate; and insert meat probe into thickest part of brisket. Place pan of water under smoker grating to keep meat from drying out.
- SMOKE BRISKET (for 5-8 hours) until temperature of meat reaches 150F/65C (or up to 160F/71C) as per reading on probe or instant meat thermometer. During this time, you will need to: >add 2-3 chunks of wood about every 30-45 minutes (when you no longer see smoke coming out of smoker chimney), depending on how smoky you want your brisket;>spray brisket with apple juice (optional) to keep surface moist and allow better smoke absorption;>monitor smoker temperature probe to maintain heat between 230F and 250F (110-121C), adding charcoal briquettes as needed and opening and closing dampers as needed. The important thing is not to open the lid to often as this will lower the temperature of the smoker. >monitor meat temperature with a probe. When temperature of meat "stalls" (no longer rises for a while), typically between 150F and 160F (65-71C), it is time to transfer brisket to oven.
- TRANSFER BRISKET TO OVEN: Preheat oven to 300F/149C. Remove brisket from smoker when it "stalls" i.e. temp no longer rises after some time (usually 150F-160F/(65-71C)), cover tightly in foil or good quality butcher paper, place in large pan and put in oven. Finishing cooking brisket in oven until internal temperature of meat reaches 195-200F (93C). This could take 2-3 hours. At this point the fat will be fully rendered and the connective tissue broken down. A knife should be able to slide into the meat easily without resistance.
- REST AND SLICE BRISKET: Remove from oven and place, covered in a cooler or on counter to rest for 60-90 minutes. Unwrap and place brisket on cutting board. Slice into 1/4-1/2 inch/0.63-1.27 cm) thick slices against (perpendicular to) the grain. Serve with juices from meat. Or use juices to make a sauce.
Recipe Notes
- What type of brisket to buy: Try to buy at least the Choice cut of brisket (AAA in Canada). Prime is even better. American Wagyu even better. The more marbled, the more exceptional (although Wagyu is considerably more expensive). Find more details in this video by Aaron Franklin on buying and preparing a smoked brisket.
- Can I buy a smaller brisket? Yes, no problem. Just pay attention to the target temperatures and adjust the timing as needed.
- Make Ahead:
- The brisket can be made up to 5-6 hours ahead and kept warm, covered in foil (in an a 170F/77C oven) or in a cooler.
- Alternatively, the brisket can be made a few days ahead, sliced and served cold in sandwiches.
- Or, warmed in a 325F/163C oven with BBQ sauce or original juices from the meat for 20 minutes (if not sliced, it can take an hour or so). The internal temperature should be about 140F/60C.
Nutrition
Although several brand names have been used in this post to give readers a clear idea of what equipment is needed, neither Bob nor I have any affiliation with these companies.


put it on the grill, finished in the oven just like you wrote and turned out fantastic! 13 pounder. we got a little anxious and only let it sit for 30 mins (had a dinner party who was hangry) and it was still great! thanks!
Good to know! So glad it turned out great for your guests! 🙂
This step-by-step guide is incredibly helpful for anyone looking to master the art of smoking brisket! The breakdown of each stage—from trimming and seasoning to wrapping and resting—makes the whole process feel manageable, even for beginners. I also appreciated the tips on maintaining consistent temperature and getting that perfect bark. Can’t wait to put this into practice for my next BBQ thanks for such a thorough and easy-to-follow recipe! I have written a content about the best charcoal smoker. I hope this content will be helpful for you all. “Click here to visit the page for more detailed information.” https://www.freshflarekitchen.com/best-charcoal-smoker/
Thank you Roxanne!
Love it!!!!!
Gives you a lot of options every brisket I have cooked is always a bit different
Dennis, I hope you like this one if you try it 🙂
Simple and easy to follow directions. I did a 13 pound Beef Brisket. And my Family LOVED it…
Always great to hear. Thanks very much for taking the time to leave a review!
Simple
I’d like to purchase my husband ( first time smoker) a nice smoker for Christmas. Do you have a brand you’d recommend?
Thanks!
Hi Ina, What a lovely gift that will be! Ultimately your choice will depend on the specific features that are important to you such as size, quality, temperature control, and additional features like side burners or storage space. I don’t have a smoker so I asked Bob, the guest chef. He likes the Broil King Smoke™ Regal Charcoal Offset 500. He says it’s a well constructed, sturdy mid-range smoker, but you can also check out Weber, Traeger, or Oklahoma Joe’s as well. I hope that helps and I hope your husband likes his gift 🙂
Excellent recipe for 1st timers
Thanks Mark. Bob will be happy to hear that (and I am too!)
I followed these steps at a snails pace and 21hrs later after smoke, wrap/oven, ice chest and rest it was easily voted best brisket by friends and family.
I did cheat a little by injecting and using coke in the pan.
Thank you guys for putting the joys you guys get from cooking into this article.
-Marshall
A [long] labor of love for sure! Glad everyone loved it. And thanks for letting us know.
The season may have changed but the brisket is still favored. Thanks for the tips!?
You’re very welcome. Here’s to a great smoked brisket!