Sous Vide Burgers (Best Temp & Tips)
A reader comment: I’m new to Sous vide and this was definitely my most successful result! Done perfectly and so juicy. Jeanie
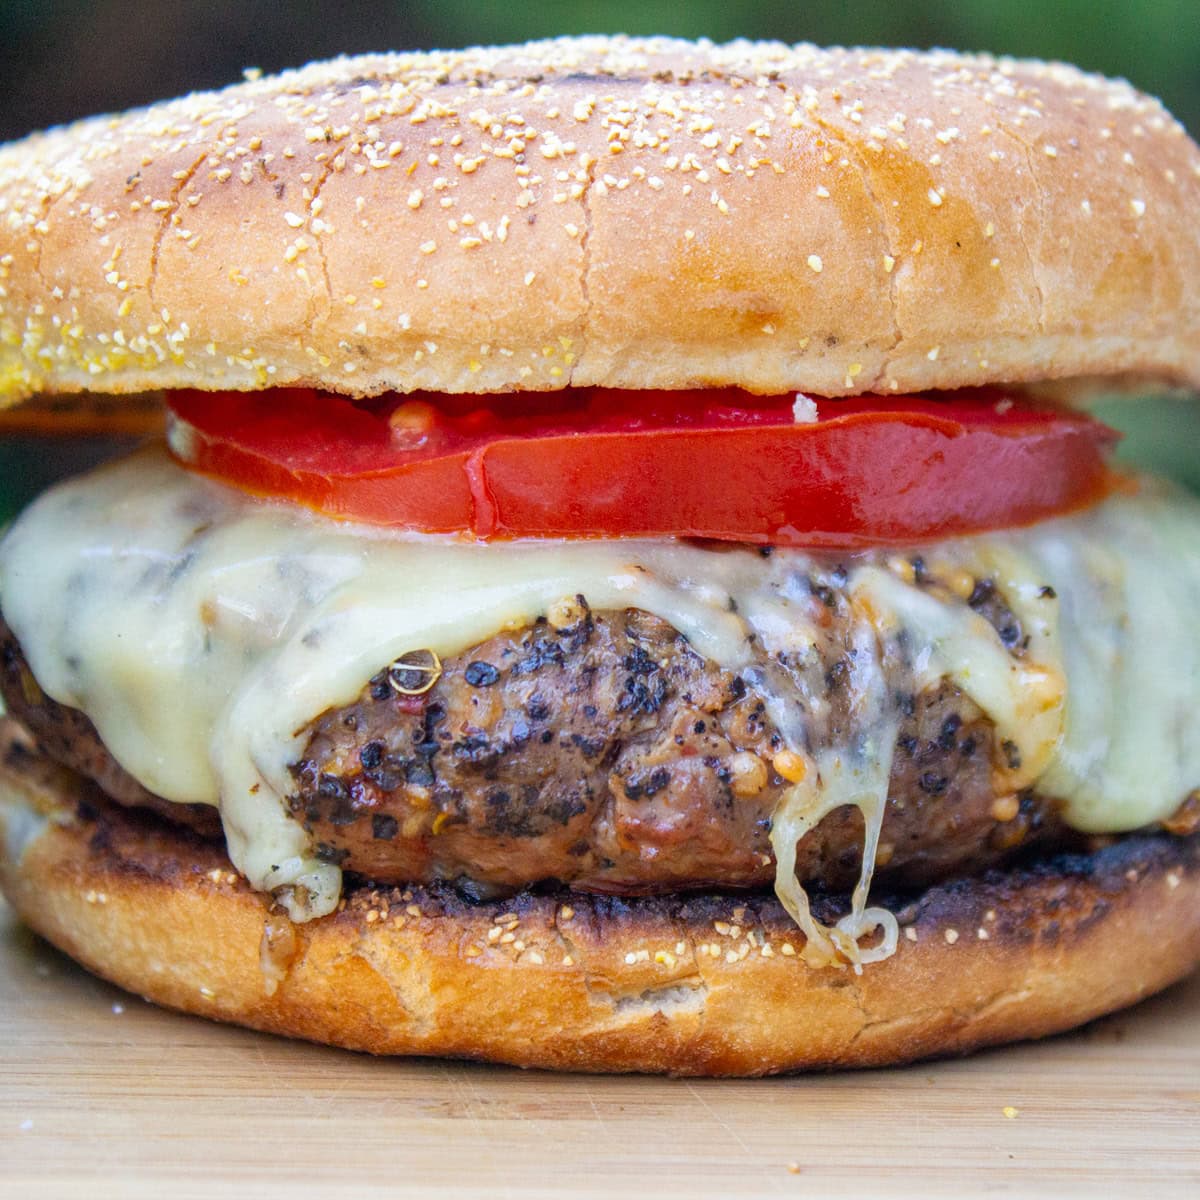
Sous vide burgers are one of the easiest ways to get juicy, perfectly cooked burgers every time – no guesswork, no overcooking.
We tested different temperatures and seasoning methods to see what actually makes a difference, and combined that with expert guidance to simplify the process.

What to expect
This method gives you evenly cooked burgers from edge to edge, with a juicy, tender texture that’s hard to overcook.
You’ll find:
- the best temperatures for different levels of doneness
- how long to cook sous vide burgers
- how to season and handle the meat for the best results
- simple ways to finish the burgers for a great crust
We also share what mattered most (and what didn’t) from our temperature and seasoning tests, so you can get great results without overthinking it.
Best temperature for sous vide burgers
The temperature you choose determines the final texture of your burger more than anything else.
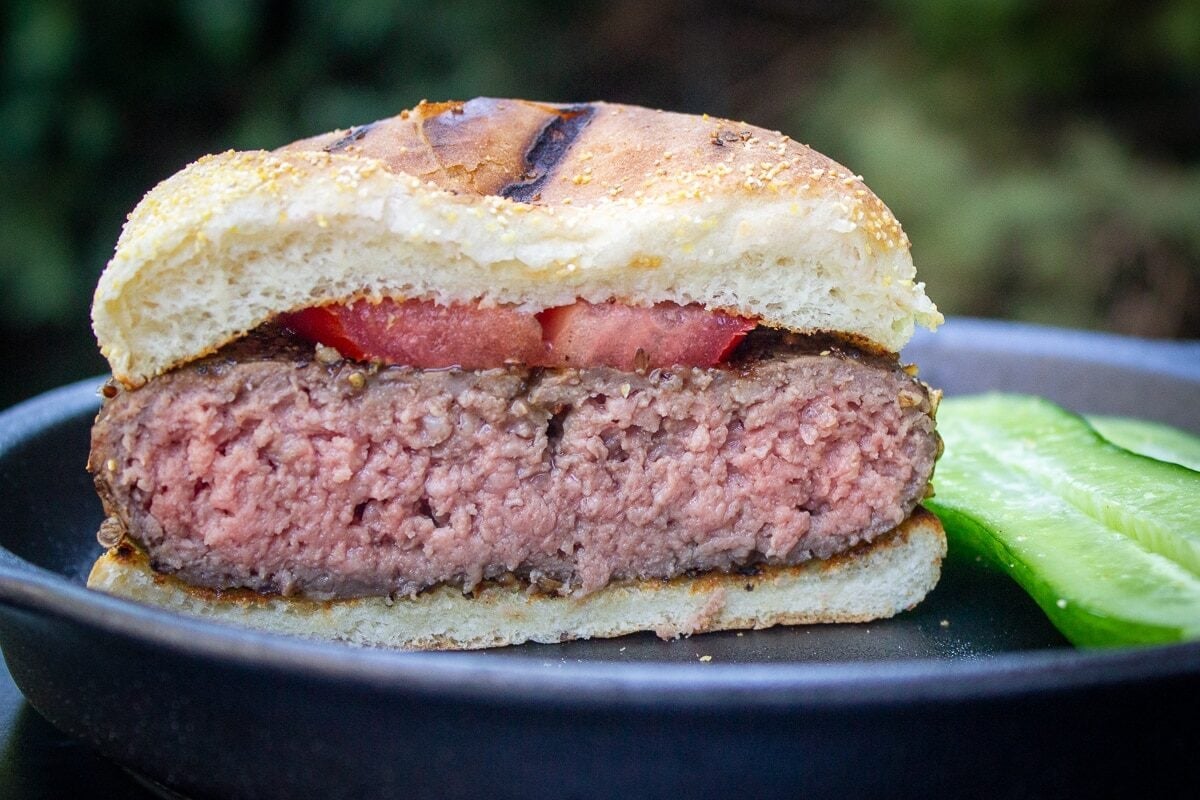
- 130F/54C – medium-rare: very juicy, pink-red, very soft texture
- 134F/56.7C – medium-rare: deeper pink, tender, but quite soft
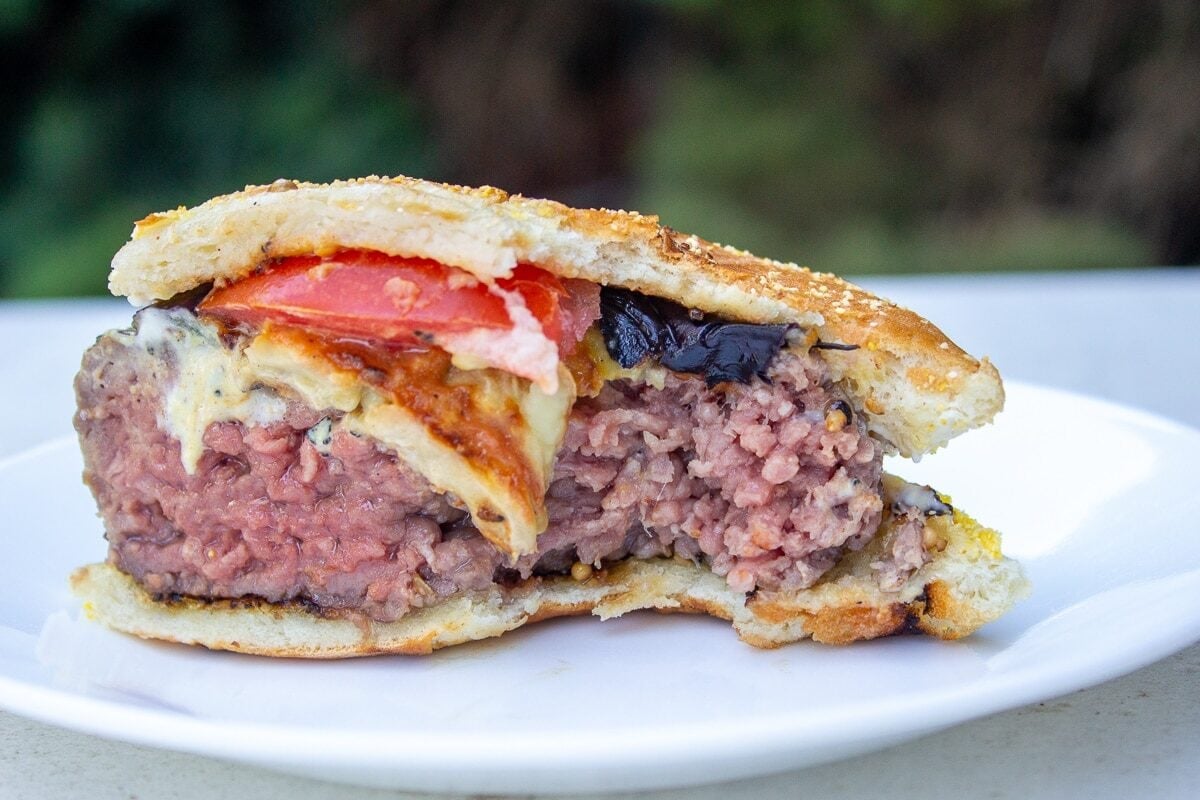
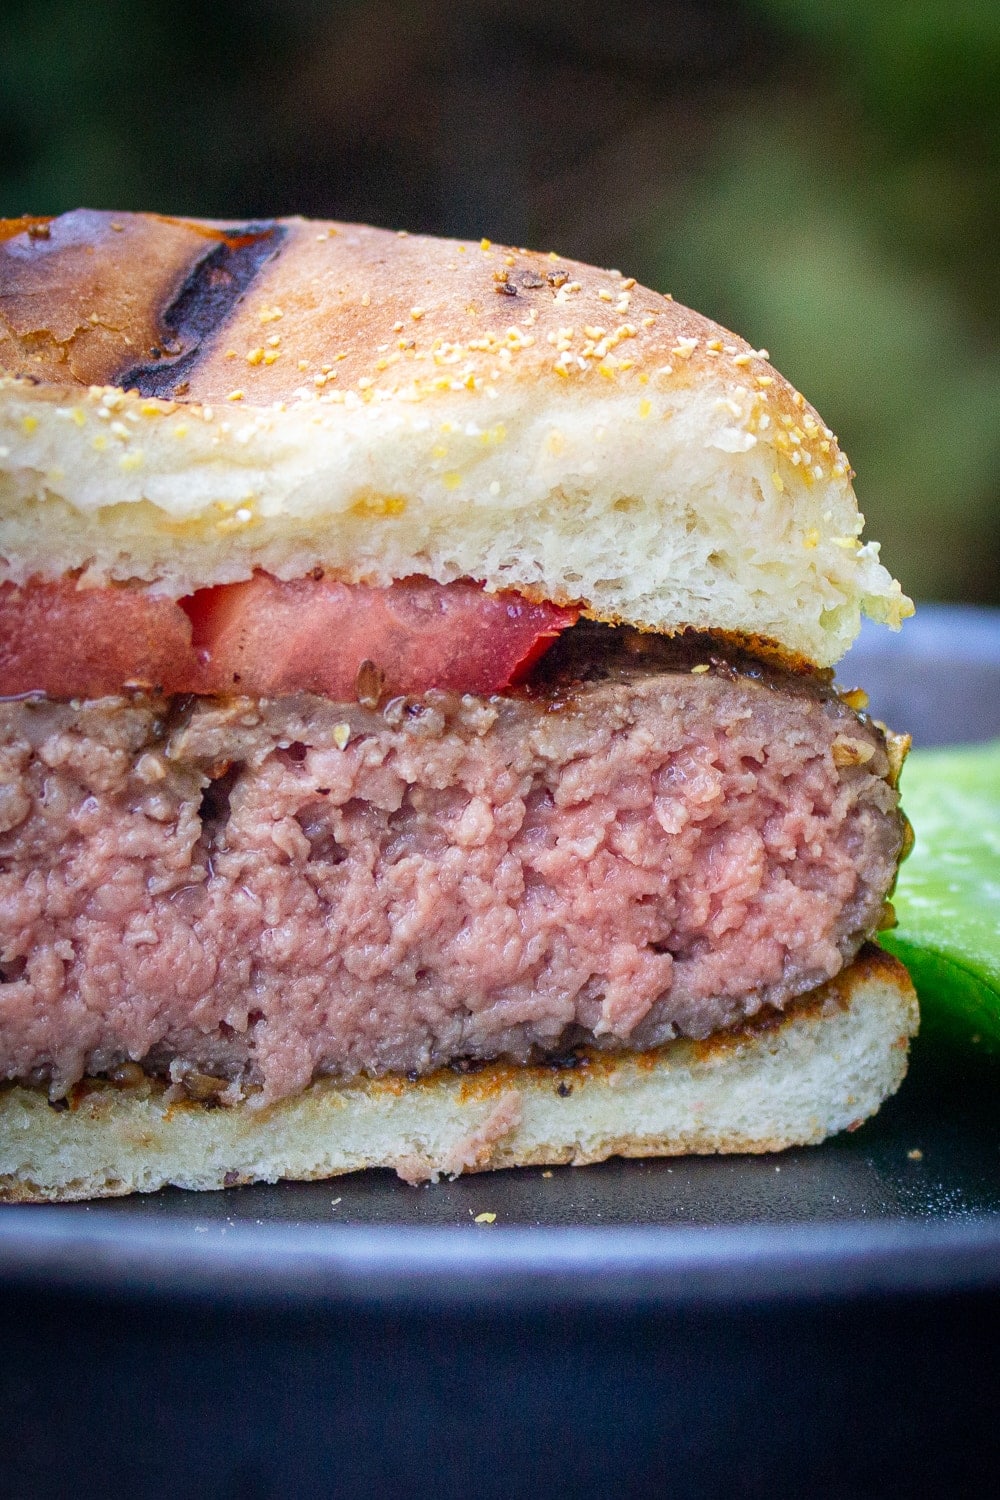
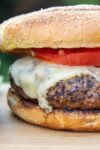
- 138F/59C – medium (our favorite): light pink, juicy with a more traditional burger texture
- 140F/60C – medium-well: firmer, still moist
Our pick: 138F/59C for the best balance of juiciness and texture.
In our testing, 134F was a bit too soft for some, while 138F gave a juicy burger with a better bite. (See FAQs for cooking safety.)
134F vs 138F (side-by-side)
Step-by-step instructions
Ingredients – tailored to your taste
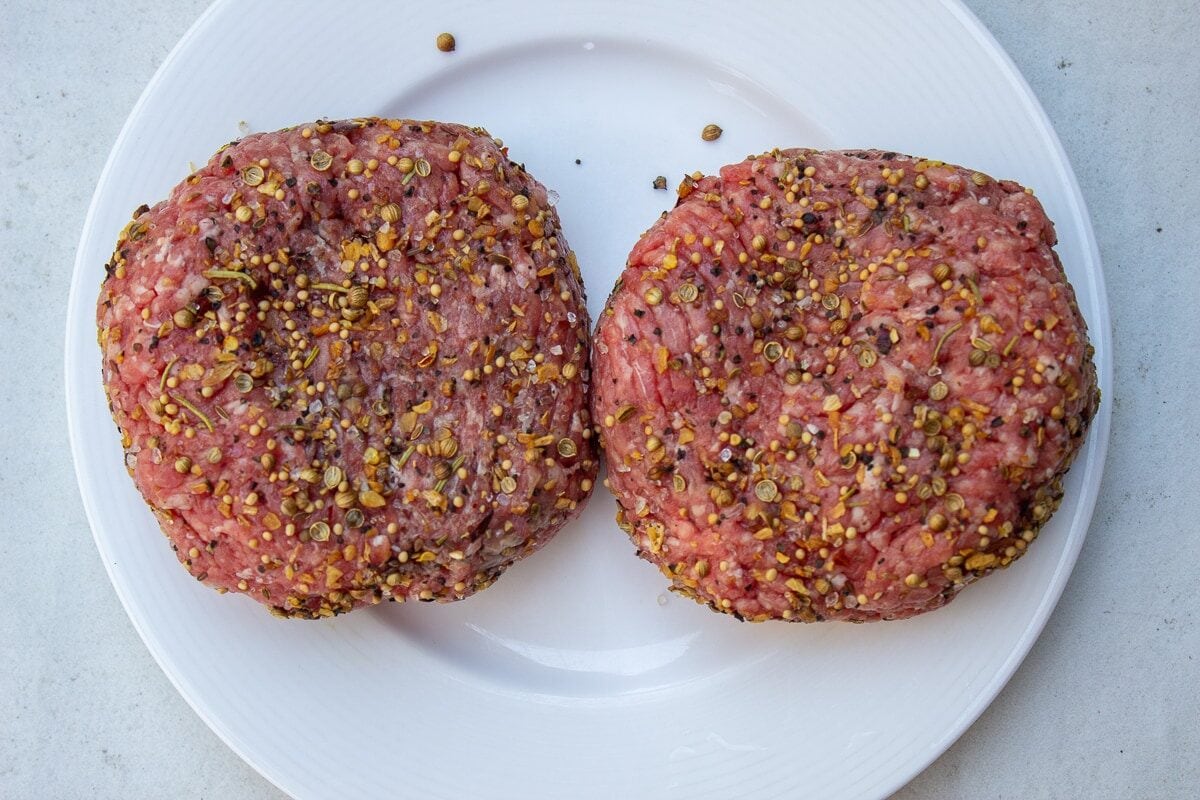
You don’t need much – just good ground beef and simple seasoning.
- Ground beef: ideally 15–20% fat for the best flavor and juiciness
- Seasoning: the basics are salt and black pepper (see options below)
- Buns and toppings: as you like
Seasoning Substitutions
Keep seasoning simple before the sous vide cook – just on the outside of the patties. Then add your seasonings and flavors generously when pan searing, grilling or with toppings.
- salt, pepper, garlic powder (classic)
- Montreal steak seasoning (a great option we liked)
- onion powder, chili powder, cumin, or thyme
What to avoid (or use with caution)
- raw garlic or onion (can taste harsh)
- too many strong herbs like rosemary or sage (a little is fine)
- liquid smoke or very strong marinades
- acidic sauces (better added after cooking)
- ketchup mixed into the beef (it creates an unpleasant texture)
You can also brush on a little BBQ sauce after sous vide and before searing for extra flavor.
Variations
Choose your doneness: Sous vide makes it easy to cook burgers exactly how you like them. See the temperature guide above (and in the recipe notes) and adjust to your preference.
Toppings: are the same as any great burger – mix and match your favorites:
- lettuce, tomato (fresh or fire-roasted tomatoes), onions (raw or grilled and caramelized onions)
- cheese, bacon, avocado
- horseradish, ketchup, mustard, mayo, relish
- salsas or a quick sriracha aioli
Tips
A few simple techniques make a big difference with sous vide burgers.
- Keep burgers thick: Aim for 6-7 ounces (170–200g) and about 1 inch (2.5 cm) thick. Thinner burgers don’t benefit as much from sous vide cooking.
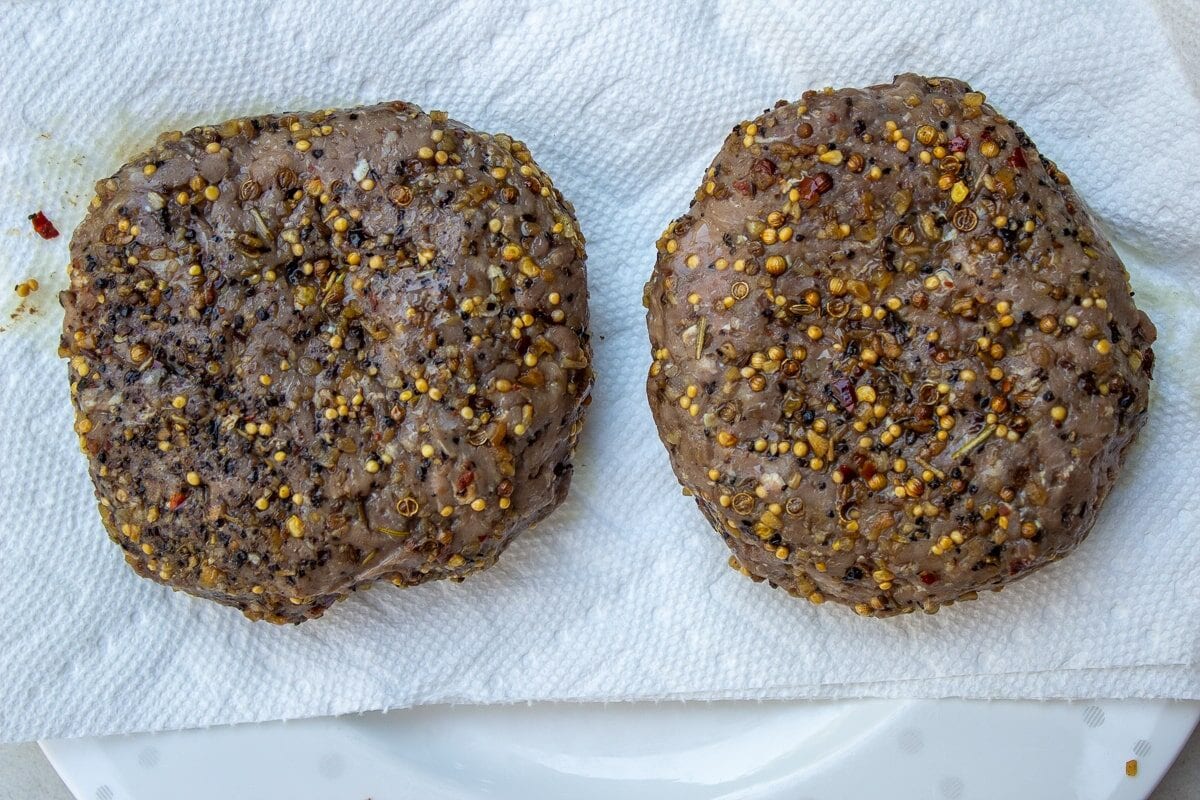
- Don’t overwork the meat: Gently shape the patties without packing them too tightly. This keeps the texture light and tender.
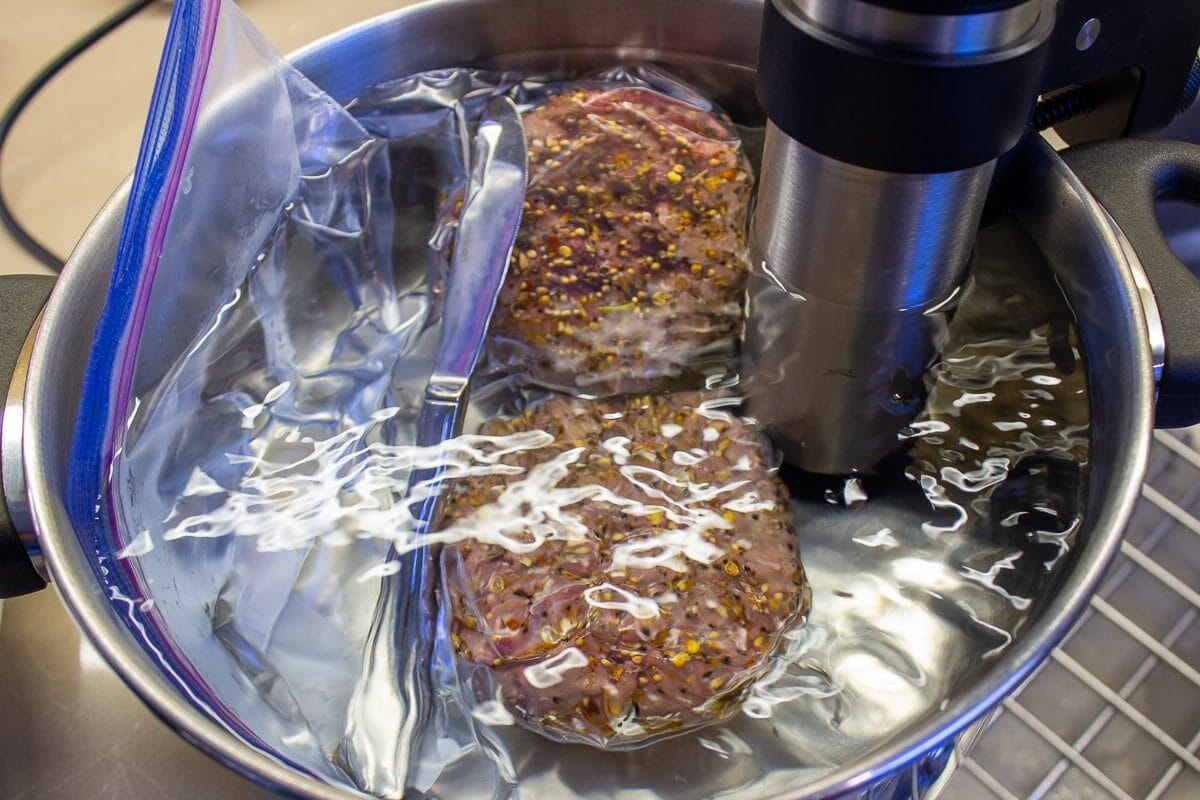
- Skip vacuum sealing: Vacuum sealing compresses the meat and can make burgers dense. Use the water displacement method with a zip-top bag instead.
- Season the surface only: Most experts recommend seasoning the outside rather than mixing salt into the meat, which can affect texture. (We tested this—see below.)
- Cook time is flexible: About 45-60 minutes is ideal. You can leave burgers in the bath longer without overcooking, but I don’t go past 2 hours as I find the burgers become less juicy.
- Rest before searing: Let burgers rest for about 10 minutes after sous vide to help retain juices.
- For a better crust (optional): For a deeper sear, pat the burgers dry with a paper towel, then chill them in an ice bath for 10 minutes before finishing. This gives you a bit more time to brown the outside without overcooking the inside. We don’t usually bother – especially when serving in buns – but it can help if you want a stronger crust.
- Why temperatures vary across sites: You’ll see a wide range of “medium-rare” temperatures online. That’s partly because people have different preferences and perceptions for doneness – and because some recipes factor in a slight temperature increase during the final sear.
Why Sous Vide Burgers (Pros and Cons)
Sous vide burgers take longer than grilling or pan-frying, but give you more control and consistency. Whether they’re “better” comes down to personal preference – but they’re definitely worth trying.
Pros
- Perfect doneness every time: Burgers cook to an exact temperature edge to edge. Once you find your preferred doneness, results are consistent.
- Juicy, tender texture: Especially with 15-20% fat ground beef, burgers stay moist and evenly cooked.
- Flexible timing: Burgers are typically ready in 45-60 minutes, but can stay in the bath longer without overcooking.
- Great for entertaining: Cook burgers ahead – even at different doneness levels – then finish them quickly on the grill or stovetop.
- Make-ahead friendly: Cook in advance, refrigerate or freeze, then reheat and sear.
- Nice crust after searing: A quick grill or pan sear gives you that browned exterior.
Cons
- Takes longer and has more steps: Sous vide + resting + searing adds time compared to grilling alone.
- Thickness matters: Burgers should be about 1 inch (2.5 cm) thick to benefit from sous vide.
- Seasoning is simpler: Most prefer seasoning the surface only (see our test below).
Our Taste Test: Temperature and Seasoning
What we tested
We ran side-by-side tests to compare:
- two temperatures: 134F/6.7C and 138F/59C
- three seasoning approaches (see image below)
All burgers were cooked for 1 hour.
Temperature results
- 134F/56.7C: Very tender and juicy, but some found the texture too soft and slightly mushy – not quite a traditional burger feel.
- 138F/9C: The clear winner. Juicy and tender with a better, more familiar burger texture – soft, but not mushy.
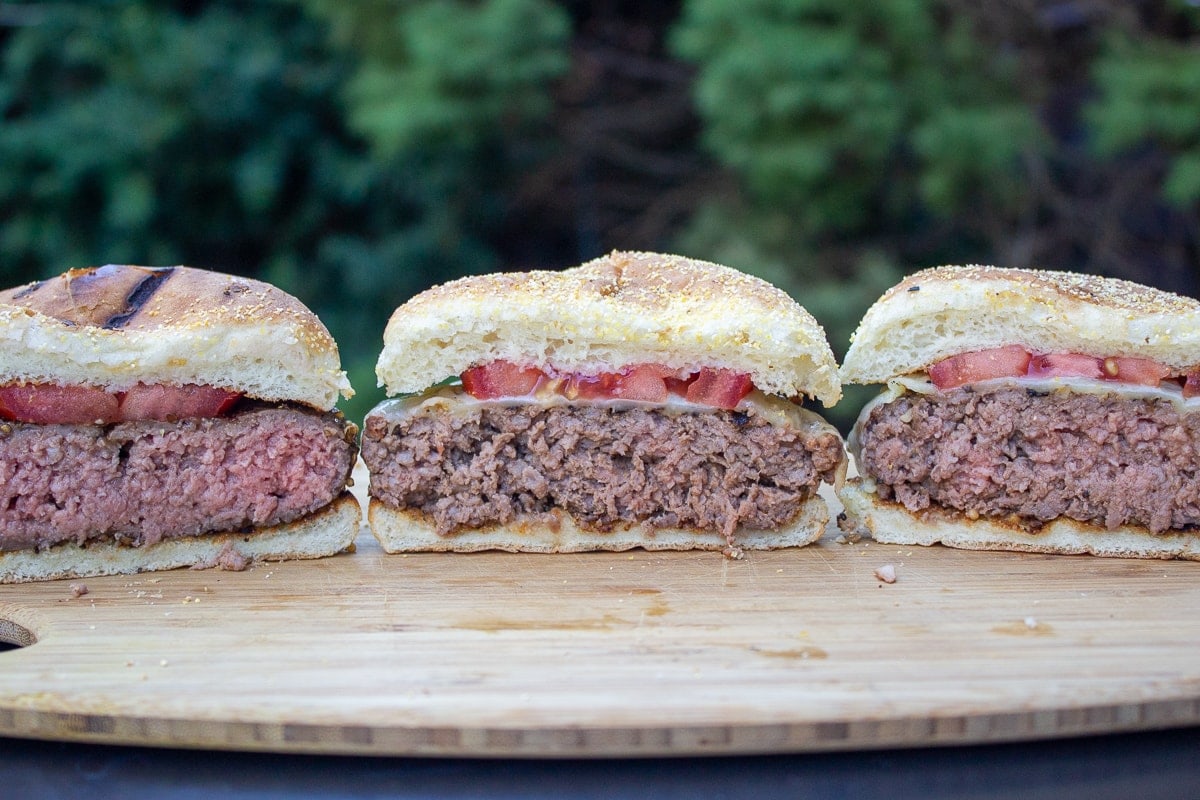
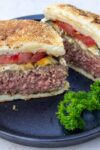
Seasoning results (at 138F / 59C)
(See image below for side-by-side comparison.)
- Outside seasoning only (left):
Best overall. Moist, great texture, and clean beefy flavor. - Mixed seasoning + 1 tbsp ketchup (middle):
Too soft with a weaker texture and slightly dry. Not recommended. - Mixed seasoning + ½ tbsp ketchup (right):
Good flavor with a more traditional burger texture. A solid option.
What we learned
- Temperature matters most – 138F/59C gave the best texture
- Less is more with mix-ins – too much added moisture weakens the structure
- Surface seasoning works best – strong flavor without affecting texture
Bottom line
For the best results:
- cook sous vide at 138F/59C
- season generously on the outside
- if mixing in sauces, keep it light (no more than ½ tablespoon per patty)
Our favorite was the simply seasoned burger (outside seasoning only), with the lightly mixed version a close second.
What to serve with burgers
Keep it simple – classic sides work best.
- fries or sweet potato fries
- grilled corn salad
- herb potato salad
- tomato and onion salad
- corn on the cob
- a spicy coleslaw or a sweet-tangy, creamy KFC coleslaw
- a pickle on the side
Recipe FAQs
Sous vide burgers take longer to make than grilled or pan-fried burgers, but you get more control and consistency – evenly cooked, juicy results every time.
Grilled burgers are faster and can have a deeper charred flavor. In the end, it comes down to personal preference – both methods make great burgers.
It can be, especially if you want precise doneness, consistent results, or are cooking for a group. For thinner burgers or quick meals, grilling or pan-frying may be simpler.
Yes, sous vide burgers are great to make ahead.
Fridge: Store cooked burgers for up to 3 days. Pat dry, bring to room temperature, then sear for about 1 minute per side.
Freezer: Freeze for up to 3 months. Reheat from frozen at 125F/52C for about 1 hour, then sear.
Love sous vide cooking?
Check out our best sous vide recipes and tips.
If you enjoyed these burgers, you might also like our sous vide hamburger steak with onion gravy – a cozy comfort food version using ground beef.
If you make this recipe, let us know how it went! A rating & comment below mean a lot to us.
Sous Vide Burgers (Best Temp)
Equipment
- Sous Vide equipment (sous vide immersion circulator or machine)
Ingredients
- 1 1/4 pounds lean ground beef (15–20% fat preferred)
- seasoning: Montreal Steak Spice, Note 1 (or salt, pepper, garlic powder)
Optional
- buns and toppings (mayonnaise, mustard, ketchup, onions, lettuce, cheese, tomatoes, mango, salsas, horseradish)
Instructions
- HEAT SOUS VIDE WATER BATH to (choose one):134–136F / 56.7–57.8C: medium-rare (softer texture) 137–138F / 58–59C: medium (our preferred range) – warm-lighter pink140F / 60C: medium-well
- PREPARE HAMBURGER PATTIES: Lightly form 3 ground meat patties of about 6-6 1/2 ounces/170-185g each, 1 inch/2.5cm thick. Don't over handle the meat. Season patties generously on both sides and edges with Montreal Steak Spice (or simply salt, black pepper and garlic powder). Transfer patties to a large zipper lock bag in a single layer. Do not use a vacuum sealer – it makes the burgers too dense.
- SOUS VIDE: Submerge bag in water bath using water displacement method (Note 2). Cook for 40-45 minutes up to a maximum of 3 hours. I find 45-60 minutes results in the juiciest burgers.
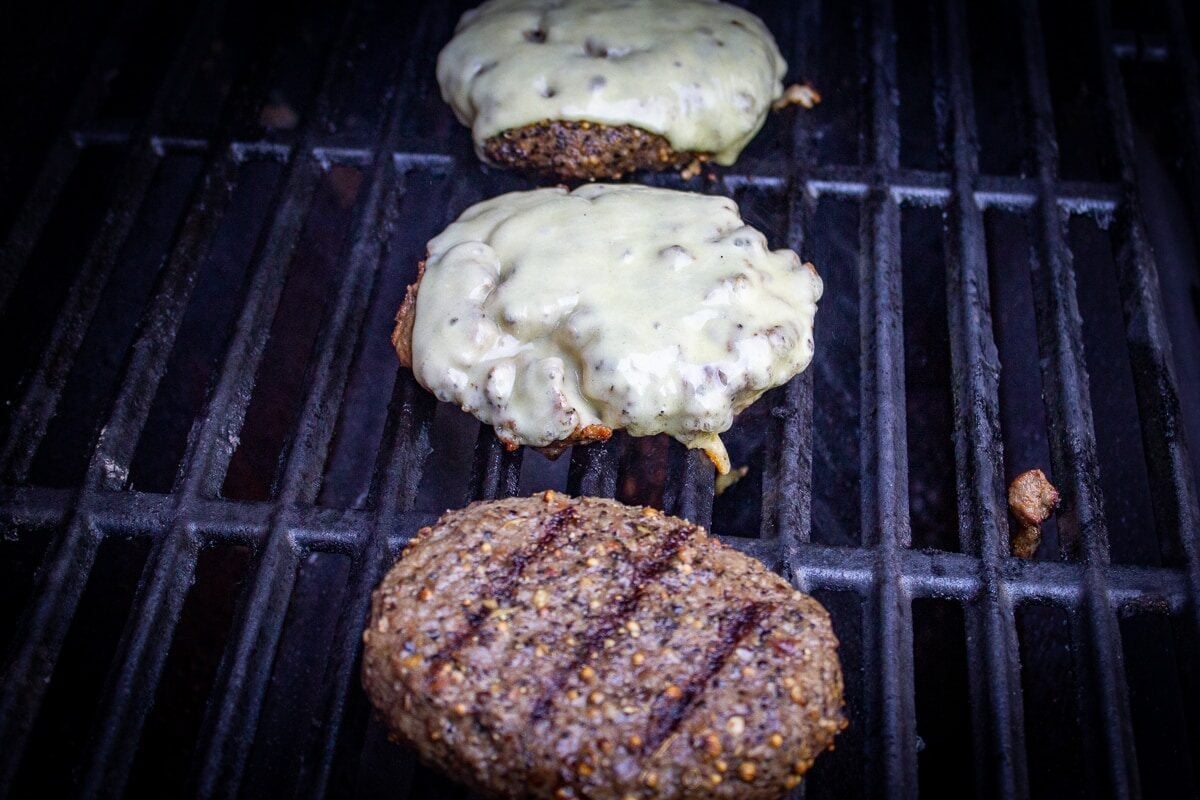
- REST AND FINISH BURGERS: Remove burgers from bag, pat dry well, and rest for about 10 minutes while you prepare grill or cast iron skillet for a quick sear. Sprinkle burgers lightly with salt and pepper. Pan sear: Heat a cast iron skillet to high (8-9/10). Add a tsp of vegetable or grapeseed oil. Sear burgers for 1 minute per side until top surface is browned. Gas grill: Heat grill to high (~500-550F). Spray burgers with oil. Grill for 1 minute on first side (cover grill). Flip burgers and grill 1 minute on second side (cover grill again) until browned. Add a slice of cheese on second side if you like. Serve in buns with your favorite toppings.
Recipe Notes
- Seasoning: instead of Montreal Steak Spice, use salt, pepper and garlic powder (or other seasonings you like). Season generously.
- For a variation, mix 1 1/2 tbsp ketchup or BBQ sauce (no more than this) into the meat along with a sprinkle of garlic powder and pepper.
- Seal bag with displacement method: Lower the unzipped bag into water until the air is pushed out, then seal. If needed, clip the bag to the side or weigh it down.
- Make Ahead
- Refrigerator: Store cooked burgers in the fridge for up to 3 days. When ready to serve, pat dry, bring to room temp, and sear on a hot grill or pan for about 1 minute per side.
Freezer: Cool the burgers, then freeze in a sealed container or bag for up to 3 months. Reheat from frozen in the sous vide at 125F / 52C for about 1 hour. Pat dry, then sear for 1 minute per side on high heat.
- Refrigerator: Store cooked burgers in the fridge for up to 3 days. When ready to serve, pat dry, bring to room temp, and sear on a hot grill or pan for about 1 minute per side.

I add a small amount of dry seasoning, no salt or liquids, to the meat when I grind it and then an additional small amount on the surface of the burgers. I like the ring molds and I like to vaccum seal, with the ring preventing compression.
Thanks for sharing your tips about your process including the ring molds. I know a lot of people like to use them.
I’m new to Sous vide and this was definitely my most successful result! Done perfectly and so juicy. I made two large patties and used the medium-rare-ish time. I’m using an Instant Pot with the Sous vide function.
Happy to hear the recipe worked well with an instant pot sous vide function. Thanks for leaving a comment 🙂