Cut-Out Sugar Cookie Recipe (Soft & Buttery)
“My go to recipe every year. True traditional holiday cookies. I love the simple decorating instructions and how you say the cookies don’t have to be perfect (mine aren’t!)” Shannon
This cut out sugar cookie recipe makes the best soft, buttery cookies with crisp edges that hold their shape beautifully and don’t spread in the oven.

A 40-year family tradition: For over 40 years, we’ve been making them for Christmas, Chanukah, Halloween, Valentine’s Day, and every decorated-cookie moment in between. So make it your tradition – get the music on, cutters out, and creative juices flowing.
What to expect
The process: Classic cut-out cookies take a little patience, but nothing tricky. You’ll follow three simple steps:
- make and chill the dough
- roll, cut and bake
- decorate (my favourite part)
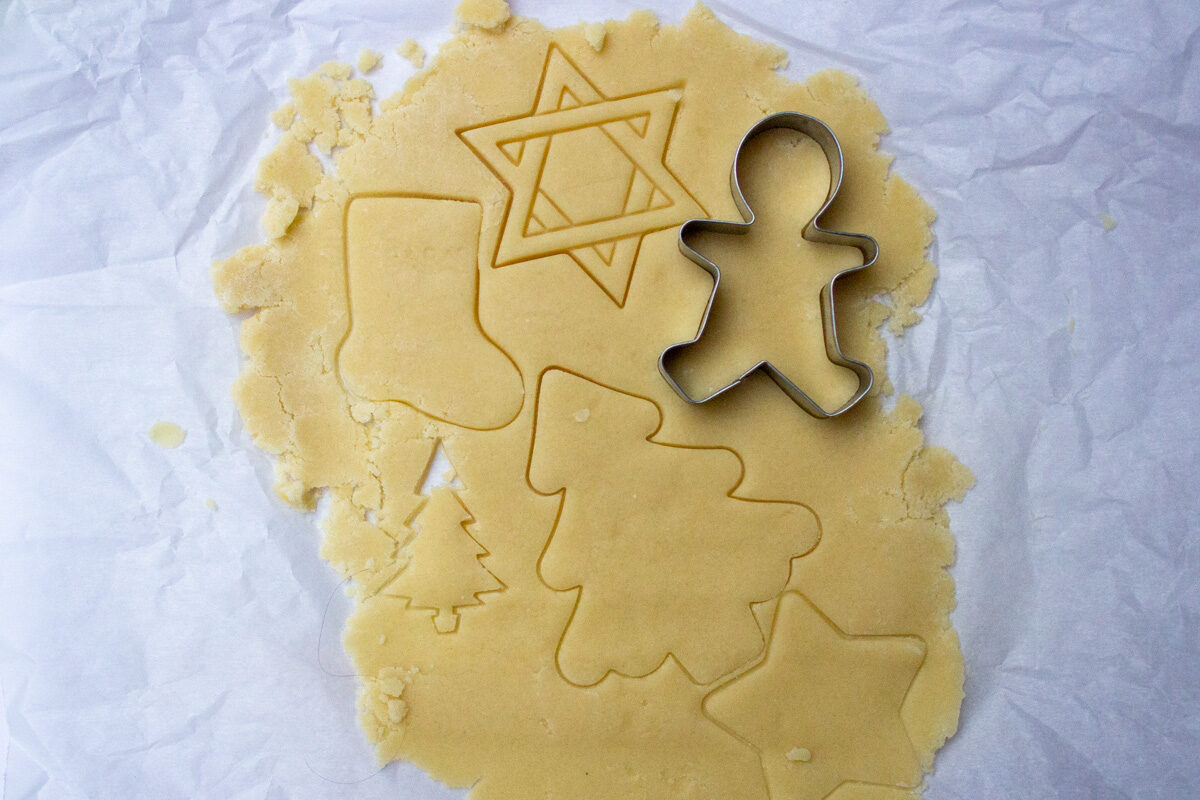
Easy rolling, no spread: The dough rolls smoothly, holds its shape in the oven, and won’t spread while baking – perfect for any cookie cutter. Roll the dough to about ¼ inch (6 mm) for soft, sturdy cookies that keep their shape.
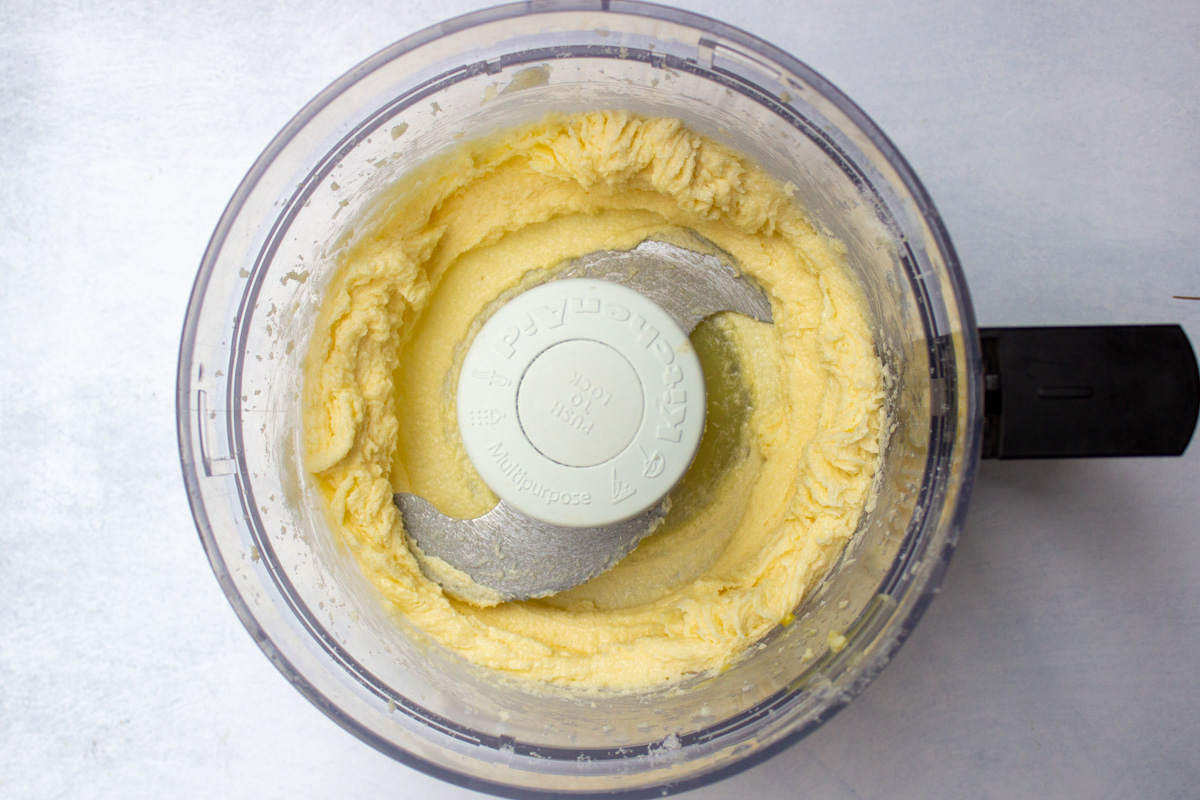
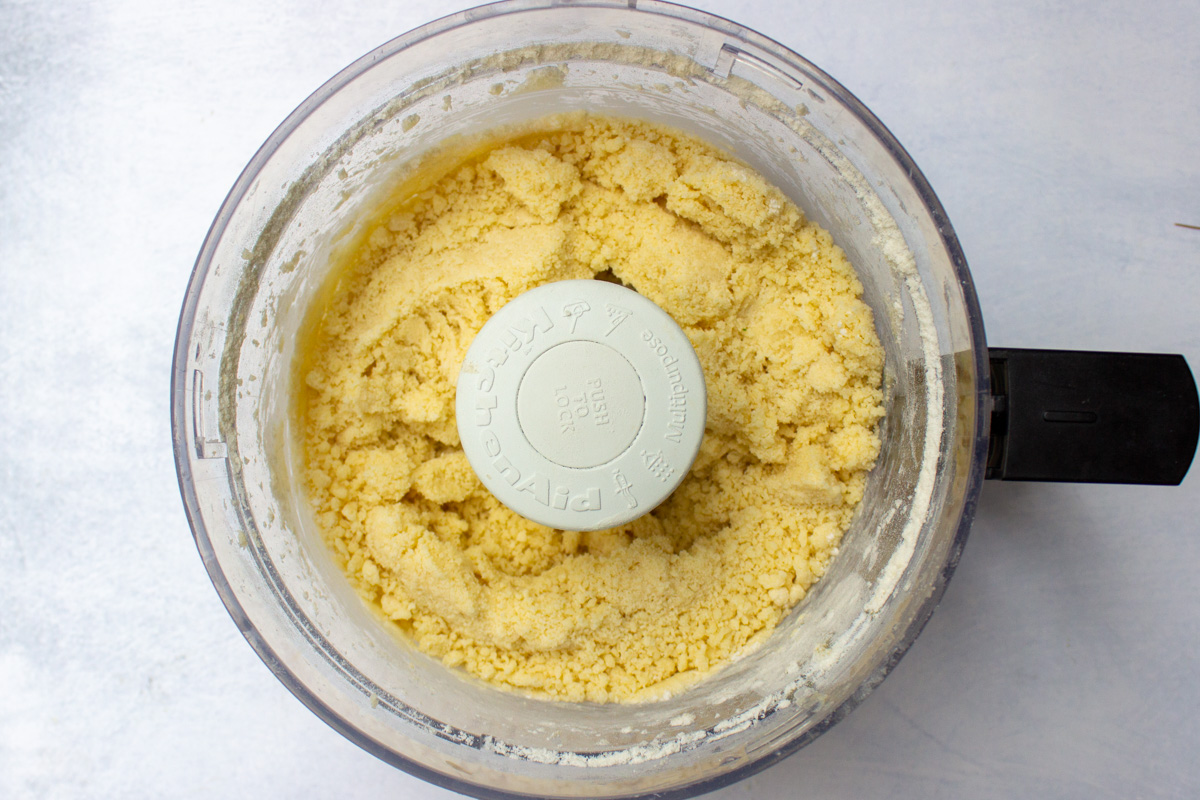
Mixing Method: We mix the dough in a food processor because it’s quick and consistent, but a mixer works too.
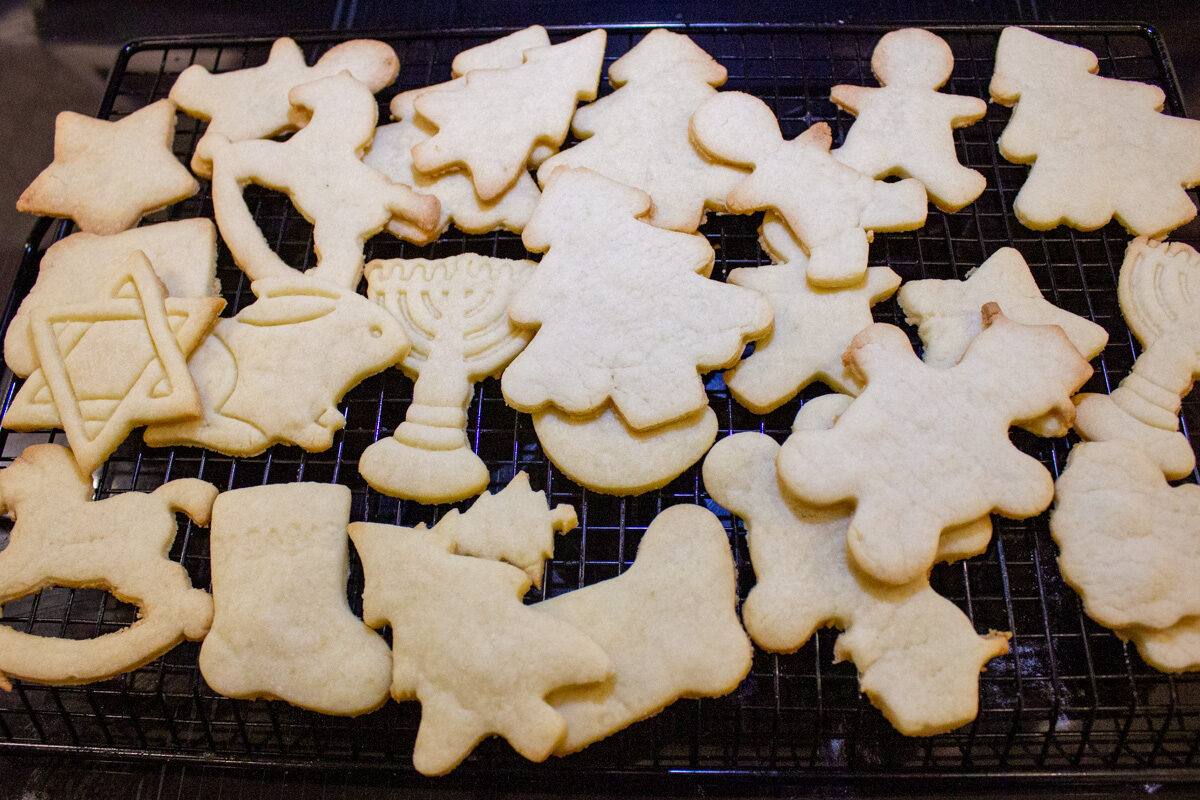
The payoff: You’ll get tender, buttery cookies that freeze beautifully and show off all the TLC you put into them. We never aim for perfect (as you can see!) – we always make a few silly or rude ones as jokes.
Ingredients – tailored to your taste and celebration
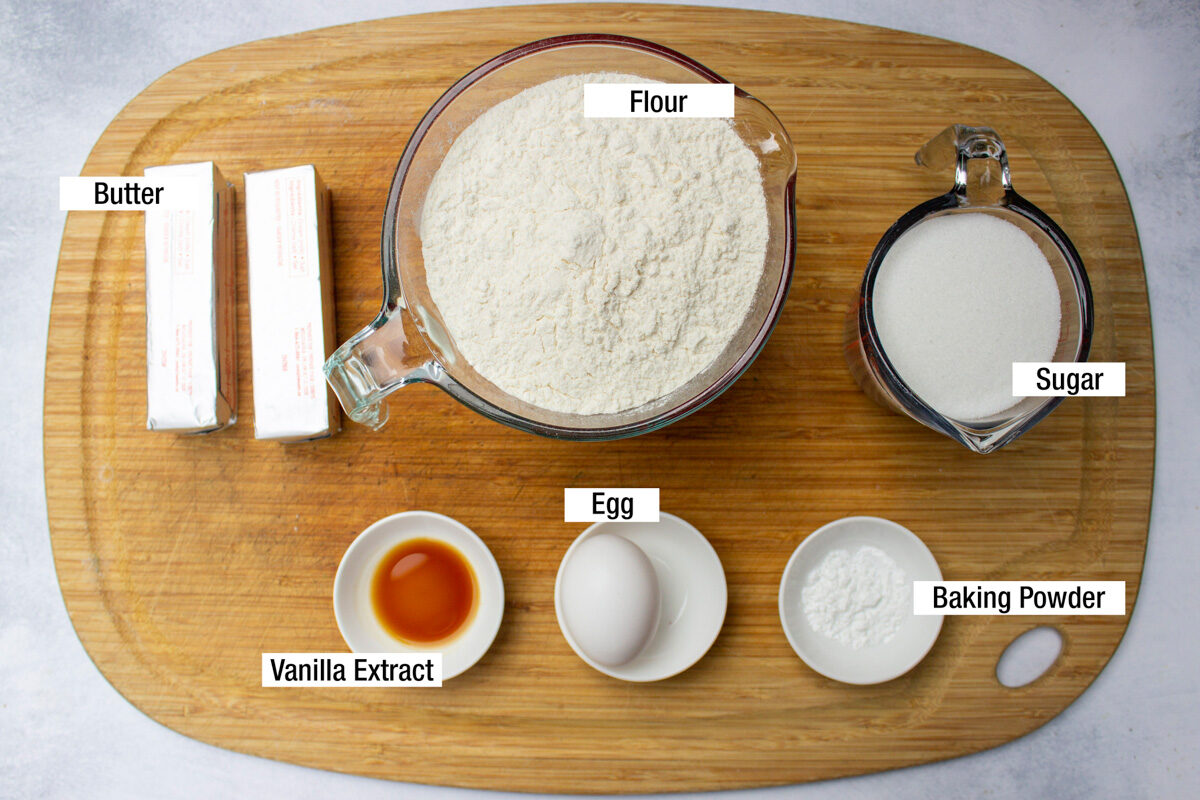

- Cookie dough: A basic dough of flour, sugar, egg, butter, baking powder, and vanilla extract.
- Glaze: Powdered sugar (also called confectioner’s sugar or icing sugar), water, corn syrup, and food coloring.
- Cookie shapes: Any cookie cutter works – pumpkins, Christmas trees, menorahs, Easter bunnies, hearts, tulips, you name it.
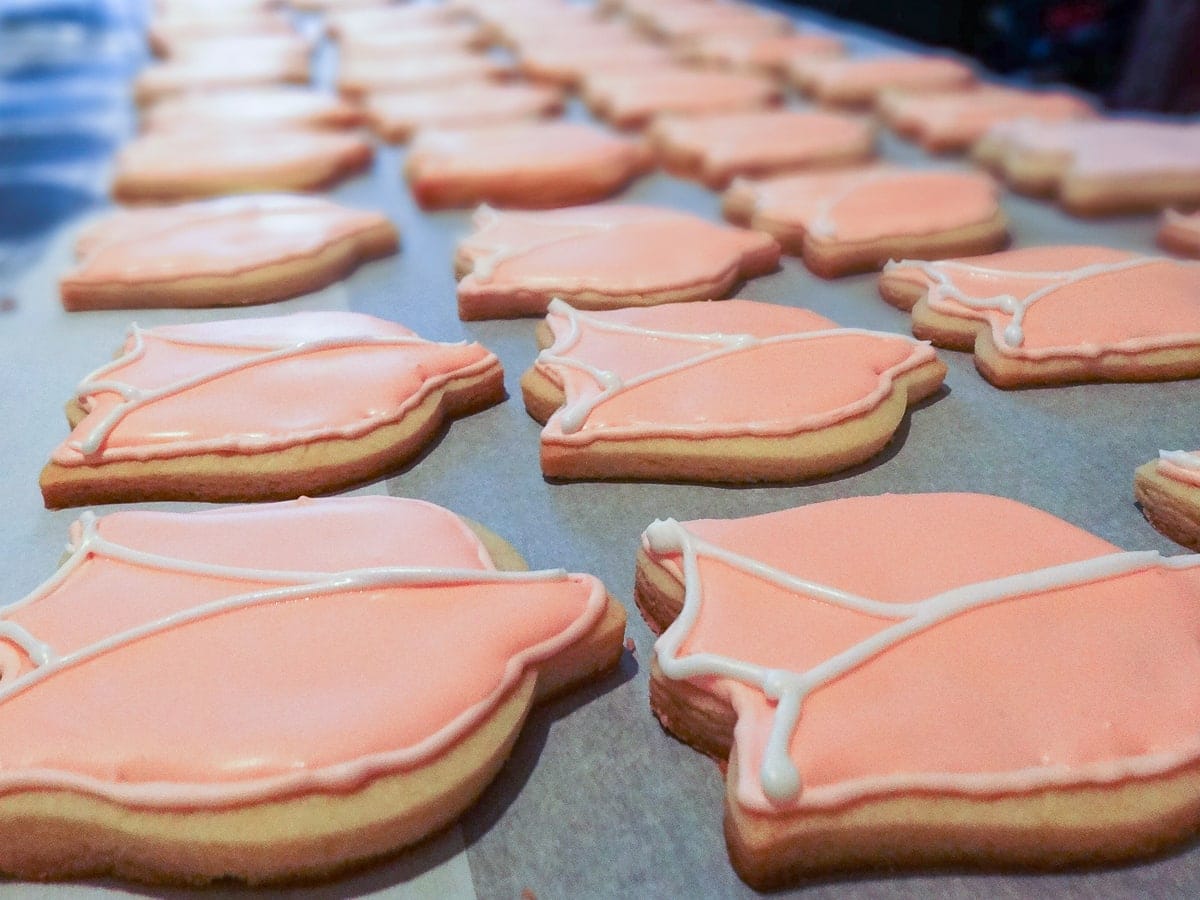
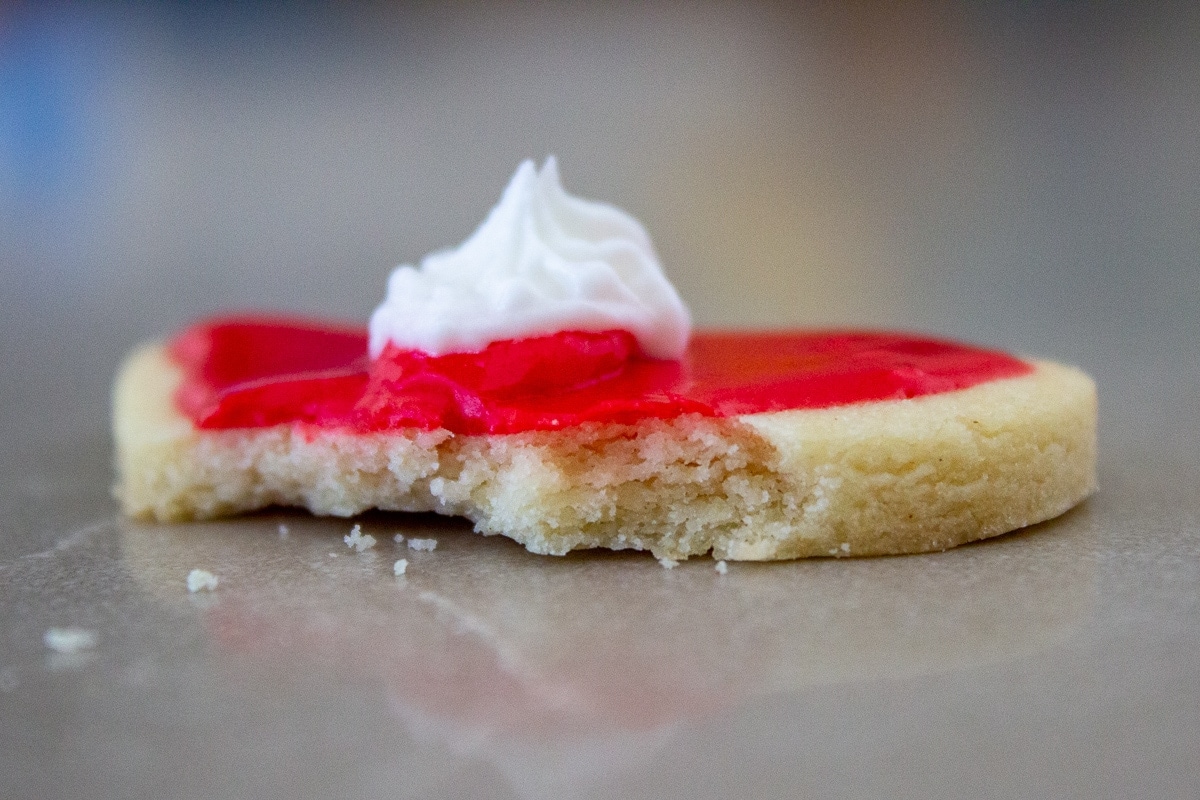
- Decorating: Go simple with glaze and sprinkles, or get fancy with tube icings. Just note: gel icings don’t harden, so decorated cookies are harder to store or freeze.
Variations
- Glaze alternative: Try royal icing for a polished bakery look (instructions in the recipe card). It takes a little practice, but the results are stunning.
- Flavor options: Swap or add to the vanilla with almond, peppermint, or coconut extract. Or brighten things up with lemon or orange zest.
This recipe is from Noreen Gilletz and never fails with cut-outs. We’ve even used it for big projects like the 150 tulip cookies we made as wedding favors for Jenna’s guests (her husband proposed in a field of tulips in Prince Edward Island. OMG, I was weepy – no, of course I wasn’t there! Jenna is a good storyteller).
Step-by-step instructions


Tips
- Use room temperature butter and egg.
- Measure flour by scooping it into a measuring cup and leveling it off.
- Chill the dough for at least 30 minutes before cutting your shapes.
- Cool baked cookies completely before decorating.
- Let glaze or royal icing dry until firm before storing (gel icing doesn’t harden, so avoid stacking).
Shortcuts
- Buy the cookies: Many bakeries sell plain holiday-shaped sugar cookies you can simply decorate at home – huge time-saver when you’re busy. Some even offer ready-made piping bags in different colours. (Shortbread cookies work well, too.)
- Ready-made icing: Pick up small tubes of decorating icing at most grocery stores for quick details and easy finishing touches.
Recipe FAQs
This recipe shouldn’t spread, but if it does, it is usually because of warm dough or too much butter. Keep the dough well-chilled, roll it evenly, and bake on cool sheets. If your kitchen is warm, chill the cut shapes for 10 minutes before baking.
Roll to about ¼ inch (6 mm) for soft, sturdy cookies. Thinner dough (⅛ inch/3 mm) works too, but the cookies will be crisper and more fragile.
Yes. Chill the dough for up to 3 days or freeze it for 2 months, well wrapped. Let it soften slightly before rolling.
Look for pale centres with just a hint of golden brown colour on the edges. They continue to firm up as they cool.
Yes. You can freeze cookies with royal icing or glaze for 2 months. Make sure they are wrapped well and stored in a freezer-safe sealed bag.
Yes – just spread a thin layer so the cookies don’t crumble. Buttercream doesn’t harden, so store the cookies in a single layer. Here is our foolproof recipe for buttercream icing in just 3 minutes.

More easy cookie recipes (few ingredients)
- crispy butter lacy cookies (30 minutes)
- hazelnut cookies (37 minutes)
- chewy chocolate chip cookies
- elephant ears pastries (palmier cookies) 30 minutes
- lemon shortbread cookies (30 minutes)
- chocolate chip toffee cookies (25 minutes)
If you make this recipe, let us know how it went! A rating & comment below mean a lot to us.
Cut-Out Sugar Cookie Recipe
Equipment
- food processor, electric hand mixer or stand mixer; cookie cutter shapes
Ingredients
cookie dough
- 1 cup unsalted butter, room temperature (important) 2 sticks
- 1 cup sugar
- 1 large egg at room temperature 1 large egg = ¼ cup = 4 tablespoons
- 1 ½ teaspoon vanilla extract
- 3 cups all purpose flour
- ½ teaspoon baking powder
simple glaze (Note 1 for royal icing)
- 1 cup icing sugar (also called confectioners sugar or powdered sugar)
- 1 tablespoon light corn syrup optional to make icing glossy
- 1 tablespoon water
- food coloring, various colors
Instructions
- HEAT OVEN to 375F/190C
- MAKE DOUGH: Blend butter and sugar until fluffy in a food processor (or mixer on medium speed). Add egg and vanilla, mix until just combined. Add flour and baking powder in intervals. Measure flour by scooping it into measuring cup and leveling it off with a knife. Dough will seem as if it doesn't have enough moisture but continue to mix in food processor until combined. Shape into a log (or two logs) and wrap in plastic wrap or parchment paper, then put into fridge to firm up for 30-60 minutes or up to 2 days.
- CUT OUT COOKIES: On a flat work surface, roll out dough between 2 sheets of wax paper to about 1/4 inch/6 mm thick. Or just use a rolling pin dusted with flour. Cut out with cookie cutters (Note 5) and place on baking sheet lined with parchment paper or a silicone mat.
- BAKE COOKIES: for 7-8 minutes or until lightly browned at the edges. Remove from oven. Let cool for a minute then transfer to a wired rack to cool completely.
- MAKE GLAZE/ICING: Note 2 to make extra colors. Mix the powdered sugar, water and corn syrup together in a bowl with a fork or whisk. You can omit the corn syrup, but the glaze will be less shiny. Add the food coloring, a drop at a time, stirring in between, until you reach the color intensity you want. Play around with the consistency of the glaze, adding more icing sugar (to thicken) or water (to thin out) as needed.
- DECORATE: Use a small knife or back of a spoon to spread glaze on cookies. Decorate with store-bought piping icing (from a tube) and sprinkles as desired. Or use a toothpick to decorate with colored glazes on top of plain white glaze for example. Note 2 to decorate with extra icing. If you're using sprinkles, use them as soon as you glaze the cookies as they dry fast. Let the glaze harden for several hours or overnight at room temperature. These cookies dry to a nice hard shiny finish and can be stacked or piled on top of each other (except if you use icing gel which is sticky and does not dry). Note 1 for Royal Icing.
Recipe Notes
- Royal Icing (instead of simple glaze). Here’s a Royal Icing recipe and instructions on how to use it. A bit trickier, but once you get the hang of it, it looks amazing, very professional.
- Tip for making colored glazes: To make several colors of glaze icing, double the recipe, divide into small bowls, plastic cups or a muffin tin and add different coloring to each.
- To decorate with homemade icing/glaze (instead of store-bought tubes): Make another batch of the glaze as per the recipe (make it thicker adding more icing sugar or less water). Put it in a small ziploc bag with a tiny corner cut off to pipe the icing through. (If you have a piping tip, place it through the hole in the bag before you put the icing in).
- Flavors: instead of or in addition to vanilla extract, you can use almond extract if you prefer. Even peppermint or coconut extract. Try adding some lemon or orange zest.
- Make Ahead options
- Dough: Make the dough and refrigerate it for a up to 2 days. Or freeze it for up to 3 months.
- Plain cookies: Roll the dough, cut out the cookies and bake them. Cool the cookies completely (not iced), lay them in a freezer friendly sealed container or bag and freeze them. Or let them sit on the counter for a day or two before icing them.
- Decorated cookies: The glazed sugar cookies dry to a nice hard shiny finish after several hours or overnight and can be stacked or piled on top of each other (except if you use icing gel which is sticky and does not dry). They will keep well at room temperature in a sealed container for 2-3 days. You can freeze cookies with Royal icing or glaze for 2 months.


Well, these cookies have certainly become a family Christmas tradition and they never disappoint. They are my go-to every year. Thanks for the recipe!
Glad your family is still enjoying them Shannon!
My go to recipe every year. True traditional holiday cookies. I love the simple decorating instructions and how you say the cookies don’t have to be perfect (mine aren’t!).