Sous Vide Prime Rib Roast (for 3-4)
Excellent! Comes out delicious every time. I make it in my electric pressure cooker with a sous vide function. Juanita
Expect prime rib perfection – every single time. With this sous vide prime rib roast recipe, you’ll get melt-in-your-mouth, perfectly cooked beef without any of the stress or guesswork. Foolproof results with low effort.
This recipe has been updated.
You simply can’t miss with a good cut of meat, the right sous vide temperature and good seasonings. Prime rib is very expensive, though, so it needs to be done right. The sous vide method pretty much guarantees amazing tender results.
What to expect
- Super tender, perfectly cooked beef (based on your preference) from edge to edge: That’s what to expect with the sous vide cooking method.
- Same method for any size roast: While this recipe is written for a smaller 1-rib roast, you can use the exact same process for larger cuts. Simply increase the cooking time for thicker roasts – they also give you even more options for finishing.
- A game changer for stress-free entertaining! You get a window of 1-2 extra hours to serve your roast at the perfect temperature without worrying about overcooking.
- Your oven remains free to cook side dishes like roasted potatoes and vegetables for easier meal prep.
- Minor downsides to keep in mind:
- Searing step: After sous vide, you’ll need to quickly sear the roast for a beautiful crust. This takes just a few minutes. Larger roasts can be finished in a high-heat oven.
- No pan drippings for gravy: You won’t get traditional drippings, but you can easily make delicious gravy with beef broth (see recipe notes for options).
- Longer Total Cook Time: Sous vide takes longer than oven roasting, but it’s very hands-off and leaves more time for prepping sides or relaxing!
Ingredients – tailored to your taste
Prime rib roast: For the most flavorful and tender cut, look for a well-marbled prime rib. Bone-in or boneless. The highest quality is USDA Prime. Other good options include Certified Angus Beef (CAB) and slightly lower quality USDA Choice (or AAA in Canada), which offer decent marbling and tenderness, although not as rich as USDA Prime. These options need an extra 2 hours cook time.
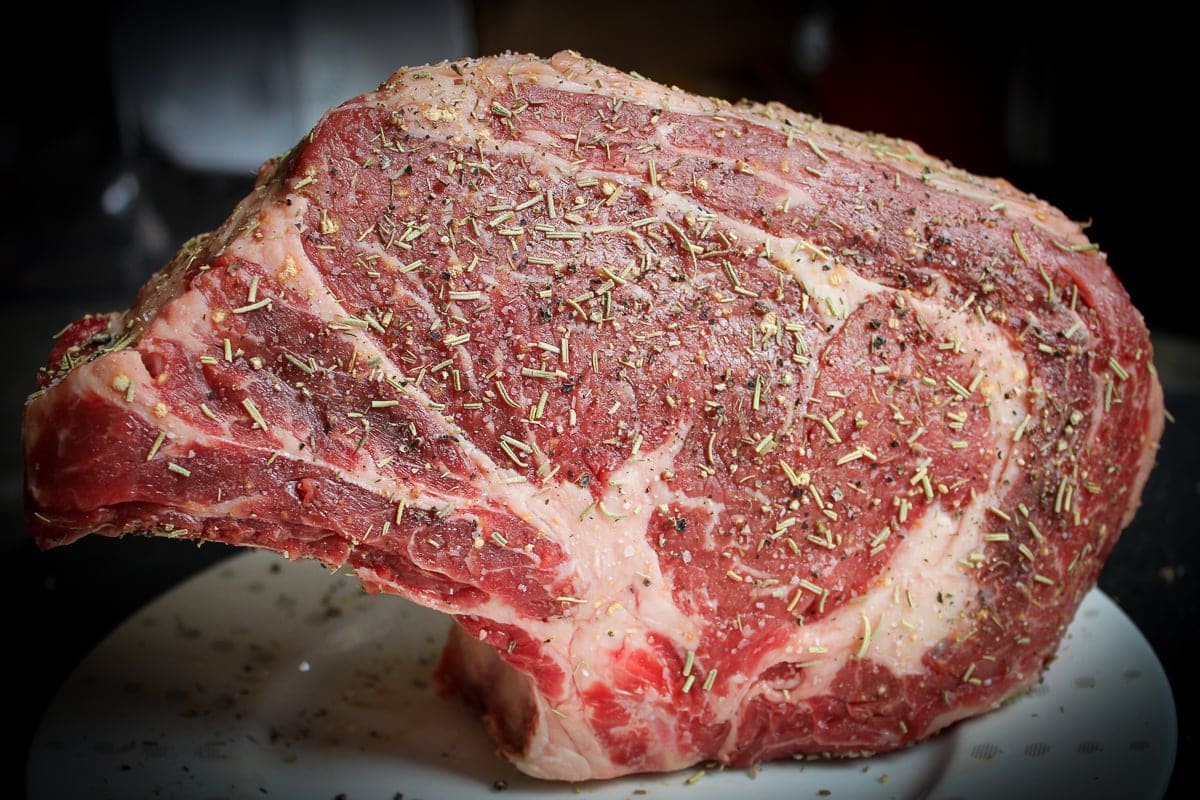
Seasonings: I use kosher salt, black pepper, garlic powder and dried thyme and rosemary (or a sprig of fresh herbs).
Variations:
- Sprinkle on a bit of sea salt on the sliced meat when serving to amplify the flavor.
- Smear a butter-garlic-herb mixture on the outside of the meat after searing. I do it after searing as butter burns easily with high heat.
- Rub a thin layer of Dijon mustard and seasonings on the meat before the finishing sear step.
Step by step instructions

Tips for Success
- Best cut to buy: Prime rib is an expensive cut of meat. If you’re going to splurge, I suggest getting the best you can afford – and look for sales. USDA Prime is the best you can buy. Other cuts are delicious too – just add a bit of cooking time.
- Season well before sous vide cooking: This helps infuse the flavors of the herbs and spices as it cooks.
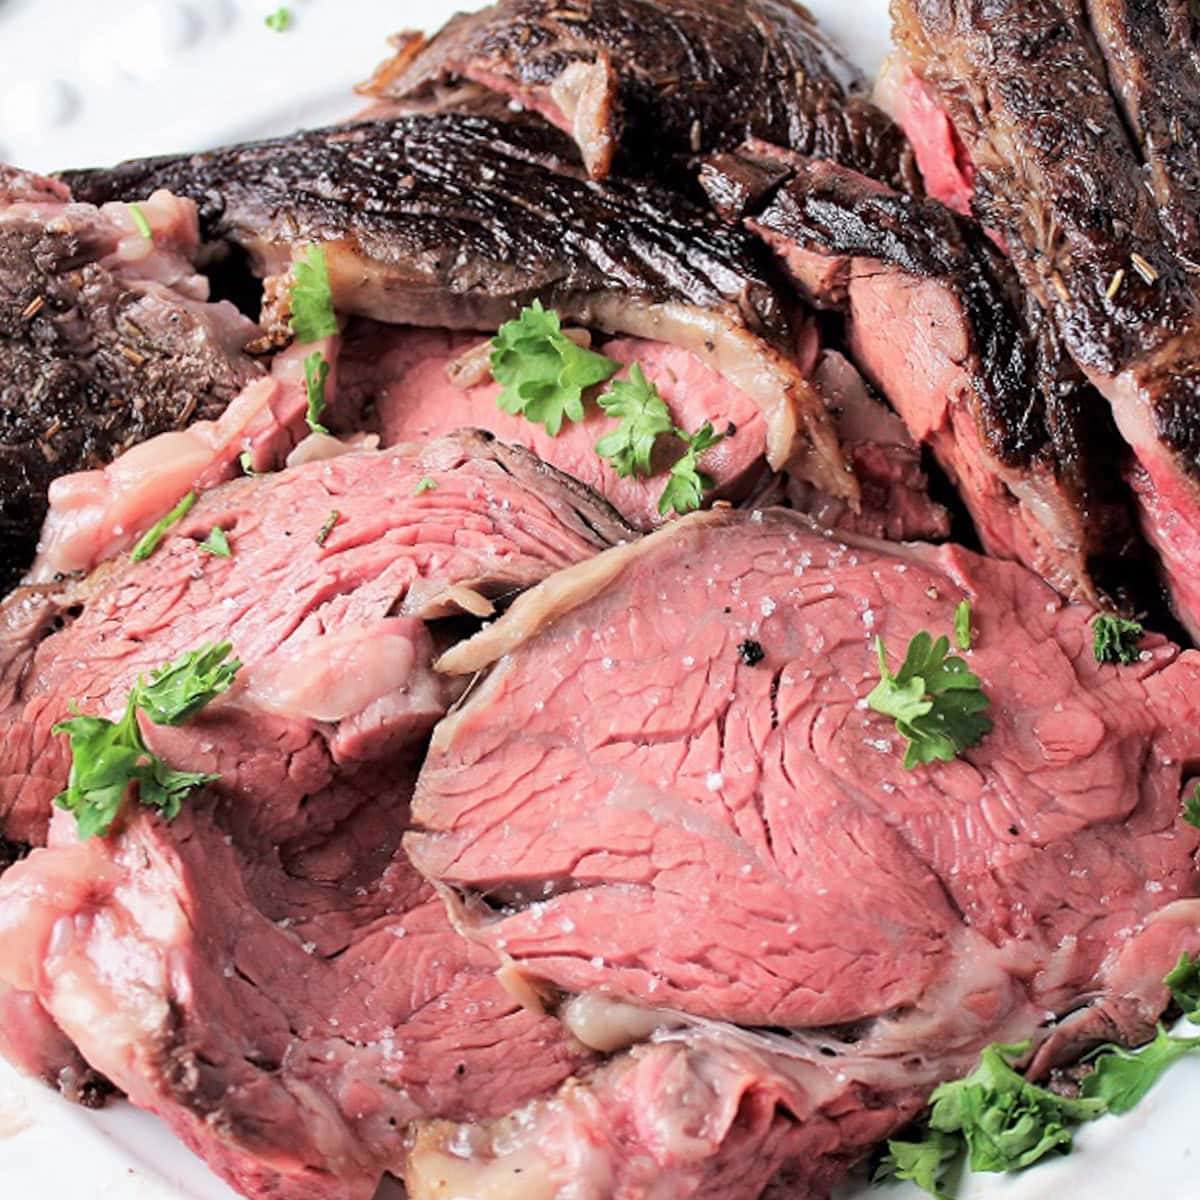
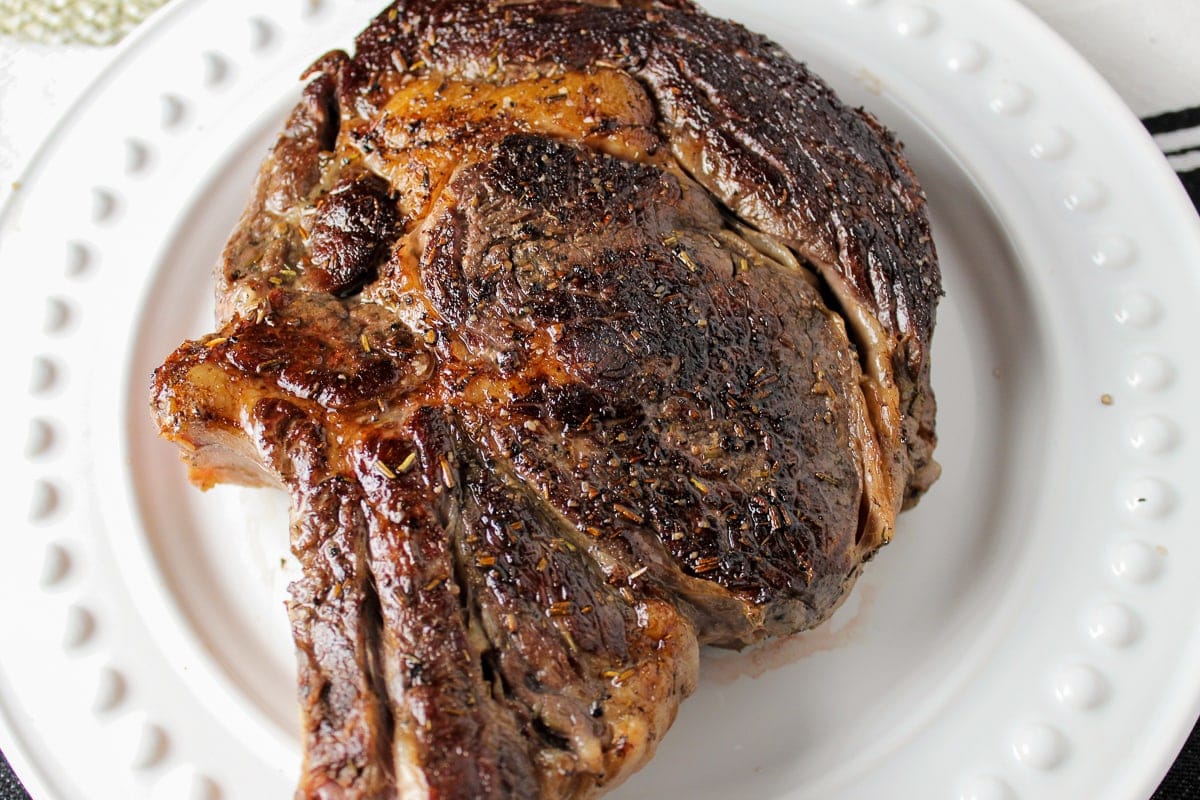
- Don’t skip the sear: Though it is an extra step, re-seasoning and searing the meat in a heavy or cast iron skillet gives it a flavorful exterior and much nicer appearance. Meat straight from the water bath is not pretty!
- Use a high smoke-point oil for searing: Here is an article on best oils for various cooking needs.
- Give it a rest: Although technically not required for sous vide cooking, I like to rest the meat for 10 minutes to allow the juices to redistribute throughout the meat.
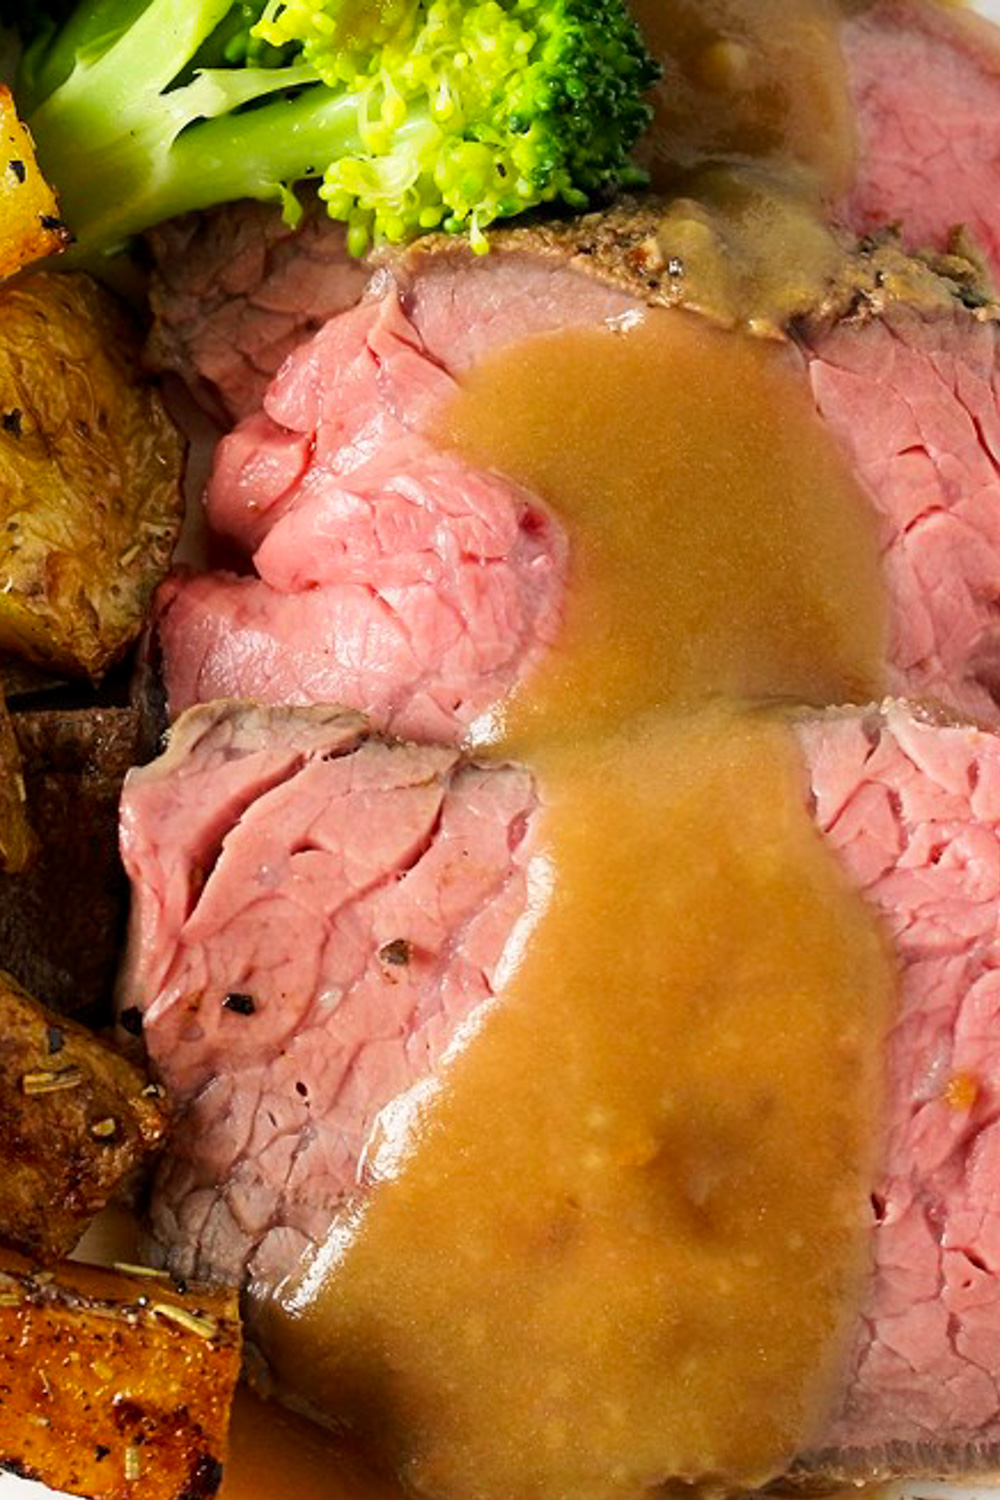
What to serve with prime rib
Some of my favorite side dishes for prime rib are:
- crispy oven roasted potatoes or cheesy scalloped potatoes (simplified, 1 hour)
- oven roasted vegetables or roasted honey-thyme carrots.
- mashed potatoes or root vegetable mash
- green beans with panko crumbs
- healthy creamed spinach (15 minutes) and
- citrus salad with greens or a tomato and onion salad
Gravy for me is a must: Try our delicious 5-minute beef gravy without drippings (with beef broth) or our 5-minute Better Than Bouillon gravy.
Other great condiments: a light sprinkling of sea salt, herb sauce, creamy horseradish sauce (classic), garlic herb butter, peppercorn sauce, and red wine reduction sauce.
Recipe FAQs
The sous vide method of cooking is a technique in which food is sealed in a bag, immersed in a container of water and cooked at a consistent, precise temperature. This cooks the food to the exact internal temperature (e.g. medium rare) that you choose. No worries about overcooking. Meats are amazingly tender. And the whole process is pretty much stress free.
For a bone-in prime rib, figure 3/4 – 1 pound (0.34-0.45 kg) per person. For a boneless prime roast, figure 1/2 pound (0.23 kg) per person. These are generous portions.
Yes, you will need to sous vide the roast for longer IF the prime rib is thicker. Timing depends on thickness, not weight. A thick prime rib will take from 5-10 hours.
For a smaller portion of beef as used in this recipe (2.2 lbs/1kg), I suggest sticking to searing to prevent overcooking it. If the meat is larger (thicker), you can blast it in a 500F/260C oven for 5-8 minutes or on the grill for a minute per side.
I (and many chefs) use garlic powder instead of raw garlic for seasoning meat before sous vide cooking. Fresh garlic can have safety issues at certain temperatures and a harsh unpleasant taste.
When properly stored in the freezer, cooked prime rib can last for several months. Make sure to double wrap it in plastic wrap then with a layer of foil. Label the wrap with the date it was cooked.
More sous vide beef recipes (less expensive)
- tri tip
- New York striploin
- chimichurri steak (sous vide or grilled)
- flank steak
- chuck roast (for French dip au jus)
If you don’t have sous vide equipment, check out our classic prime rib (reverse sear) recipe – another fabulous way to make a prime rib roast.
If you make this recipe, let us know how it went! A rating & comment below mean a lot to us.
Sous Vide Prime Rib Roast (for 3-4)
Equipment
- Sous Vide equipment (immersion circulator or oven-type sous vide machine)
Video
Ingredients
- 1 kg (2.2 lbs) prime rib of beef, 1 bone, well marbled, Note 1 (2 inches/5 cm thick)
- seasonings: kosher salt, black pepper, garlic powder, dried rosemary or thyme (or fresh sprig)
- canola or avocado oil (or any high smoke-point oil for final sear)
- sea salt flakes for finishing (optional)
Instructions
- HEAT SOUS VIDE WATER BATH: Fill the sous vide container (large pot or plastic container) about 3/4 full with water. Set temperature on sous vide equipment to the level of doneness you prefer, Note 2. The water will take about 15 minutes to reach the correct temperature (or less if you start with warm water and a smaller container).
- SEASON MEAT: Generously sprinkle the roast with kosher salt, black pepper, thyme, dried rosemary and garlic powder on all sides. Feel free to use a sprig or two fresh herbs, but don't overdo the rosemary – it's quite powerful.
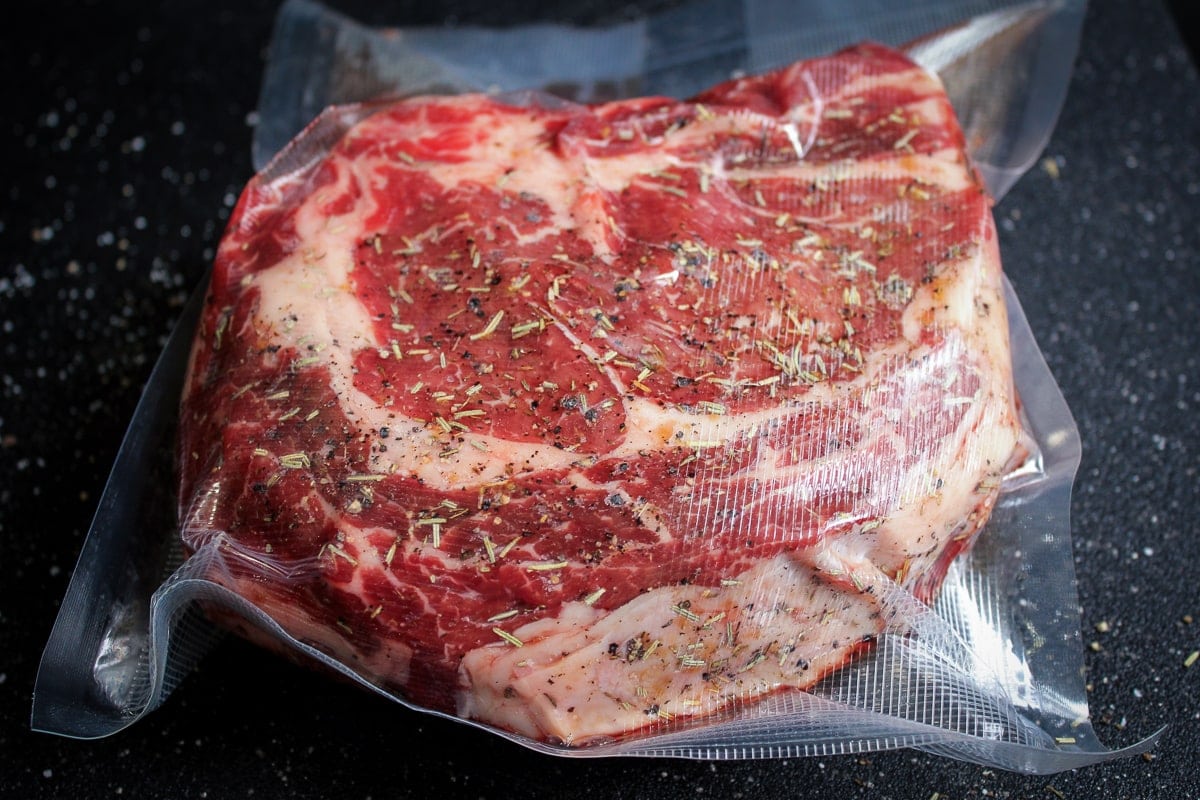
- PREPARE MEAT FOR SOUS VIDE: If using a vacuum sealer, fold over a flap on one 1-quart vacuum seal bag. Place meat inside the bag and unfold the flap. Seal the bag (and vacuum out the air) as per machine instructions. (Note 3 for displacement method with ziploc bag).
- SOUS VIDE PRIME RIB: Plunge the bag into the pre-heated sous vide bath. It will sink to the bottom (or use water displacement method Note 3). Sous vide the prime rib for 3.5 – 6 hours if meat is 2-3 inches/5-7.6 cm. Note 4 for larger roast.If meat is lesser quality e.g. choice or select, sous vide for 6-9 hours (the lower the quality of beef and the thicker the beef, the longer the cook time needed).
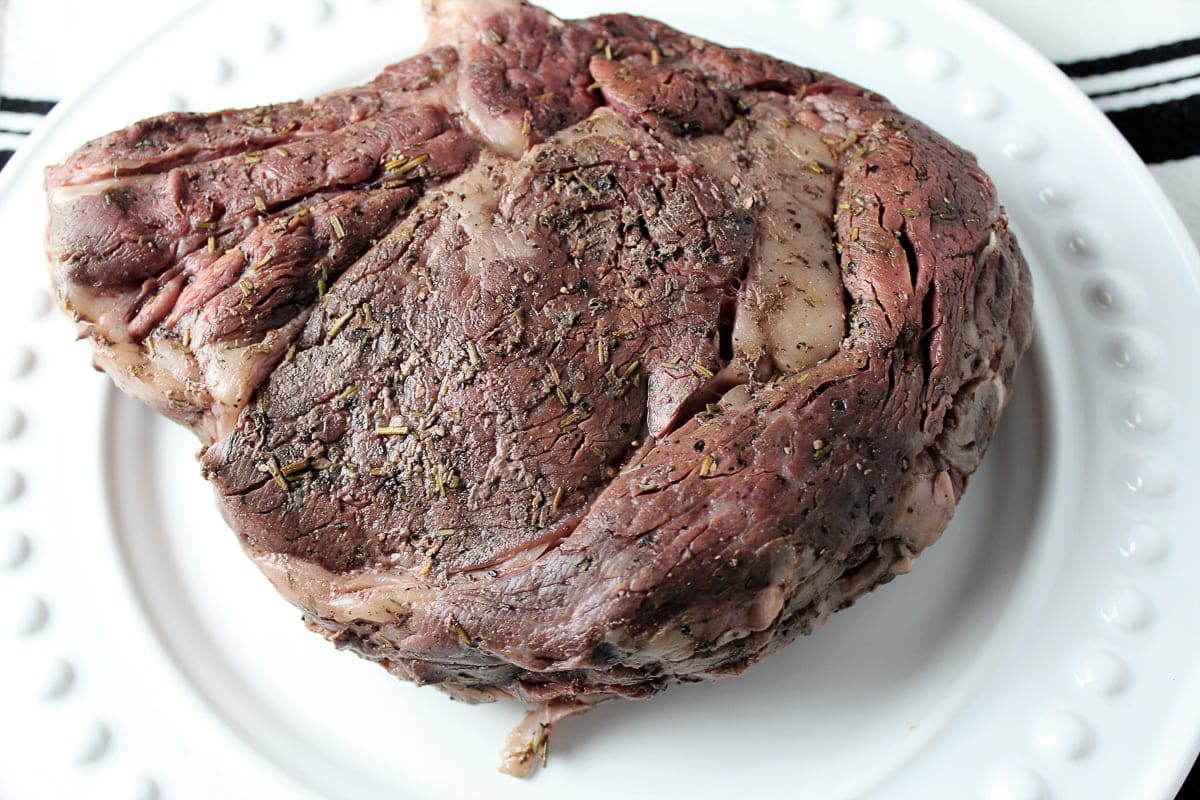
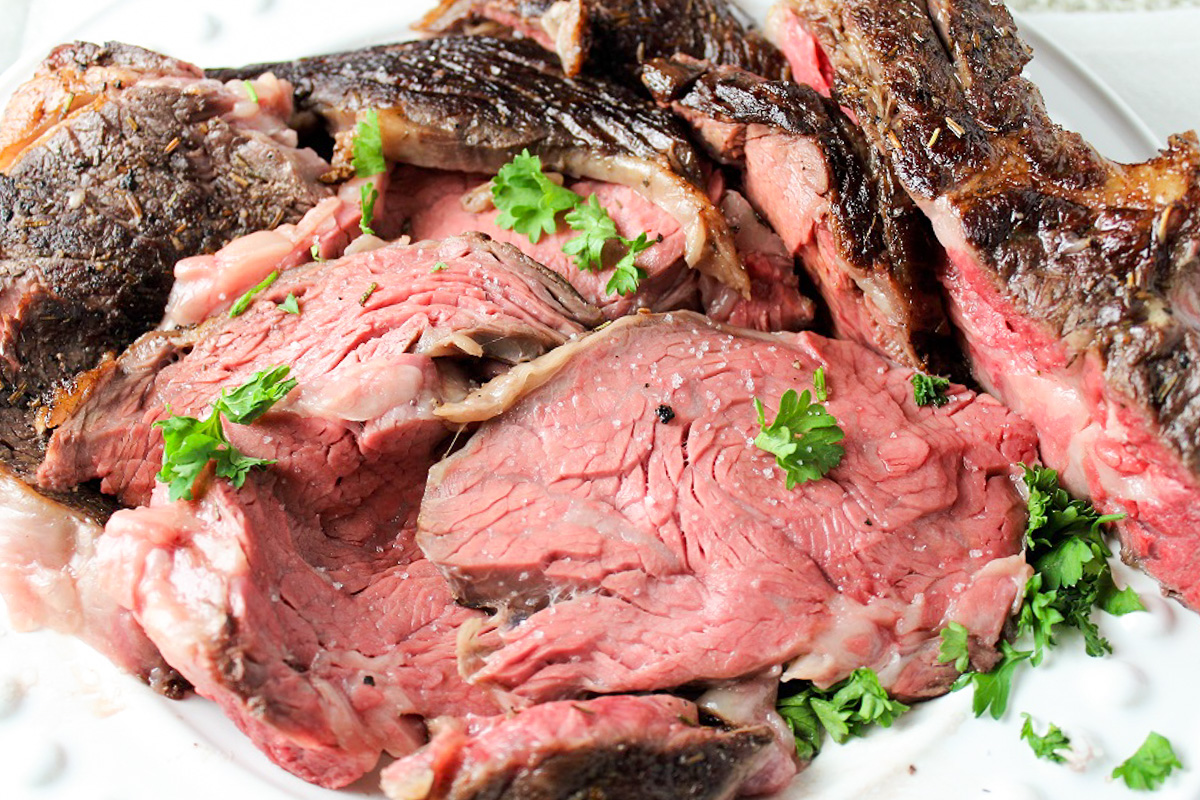
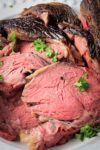
- SEAR SURFACE OF BEEF TO FINISH ROAST: Remove meat from sealed bag, reserving the juices accumulated in the bag for gravy if desired. Pat dry well with paper towels. Rub oil over meat and sprinkle again with kosher salt, pepper and garlic powder. Let rest for 10 minutes while you prepare your skillet (cast iron is best but any skillet will do). Heat skillet to high (9/10) with a teaspoon of oil. Open windows for smoke clearance. Sear beef about 1 minute on each side (including the edges) to achieve a deep brown color (maillard reaction). Remove from skillet and keep warm while you prepare a quick gravy if desired, Note 5. Slice the beef and serve with horseradish, horseradish cream or gravy. Sprinkle lightly with finishing sea salt if desired.
Recipe Notes
- Other beef cuts: If you can’t find or don’t want to splurge on a USDA Prime cut, buy Certified Angus Beef (CAB), Choice (AAA in Canada). These will require a longer cooking time (add 2-3 hours)
- Temperature for preferred doneness (do a bit of experimenting to get it right for you):
-
Doneness Temp °F Temp °C Medium Rare 132–135°F 56–58°C Medium 138–142°F 59–61°C Medium-Well 144–148°F 62–64°C Well Done 154–158°F 68–70°C
-
- Sealing with displacement method using a ziploc bag: Instead of using a vacuum sealer with a vacuum sealer bag, you can insert the meat into a regular freezer ziploc bag. Lower bag with meat into sous vide water bath just until the seal is above the water line (this will push out the air). Then seal the bag. It should sink to the bottom if all the air is pushed out which you want.
- Timing for sous vide for larger roast: If you are doubling the recipe and using a 4-5 lb/1.8-2.27kg roast that is 3-5 inches (8-13 cm) thick, you will need to increase the cook time to 5-10 hours as it will be much thicker. Timing will depend on thickness, not weight.
- Make gravy: Make gravy with the reserved juices (strained) from the sous vide bag if you like. Or simply use the au jus from the bag. Here are two good gravy recipes that don’t require drippings: 5-minute beef gravy with no drippings (using beef broth) and 5-min better than bouillon gravy
- Variations:
- Sprinkle a bit of sea salt on the sliced meat when serving to amplify the flavor.
- Smear a butter-garlic-herb mixture on the outside of the meat after searing. I do it after searing as butter burns easily with high heat.
- Rub a thin layer of Dijon mustard and seasonings on the meat before the finishing sear step.
- Make ahead:
- Make it 1-2 hours before serving
- Since you have a large 1-2 hour window beyond the cooking time, there is plenty of time to make the prime rib ahead of serving time.
- You can remove the beef from the water bath, pat it dry very well and re-season the meat, then let it sit there until you’re ready to serve (within 60 minutes or so)
- The last step of searing the meat should be done right before serving. This takes only a few minutes.
- Storing leftovers: Store in the refrigerator for up to 3 days. Wrap meat tightly in plastic wrap, an airtight container or a ziplock bag.
- To freeze – wrap properly, then freeze for up to 3 months. Defrost in the fridge overnight.
- To reheat: place the meat in an oven-proof dish, cover well and heat at a low temperature (325F/163C) for 10-15 minutes or until heated through. I sometimes add leftover gravy to the meat when reheating.
- Make it 1-2 hours before serving

You don’t mention an ice bath in your recipe, if not done the meat will continue to cook another 5 degrees effectively making the medium rare cook to medium. Plus the sear after the resting in combination with that will absolutely over cook it past the medium rare range of 134. Just some feedback if you like medium rare compared to medium. The sear is perfectly fine after just that in combination with the increased temp of the resting and the sear it is 100% guaranteed not cook past the 134°
Hi Daniel, Generally if you’re planning to serve [the 2+ inch] prime rib right away, chilling is not necessary. Especially if you only sear for a minute on each side. You can see from the pictures that the meat is not over cooked. For thinner pieces of meat like a steak, however, some find it very helpful – as you suggested – to use an ice bath to chill the meat before searing in order to give a little extra time on the pan or grill to get a good sear/crust and to not over cook the meat. That’s one good reason to use chilling. Another is to get the temperature down quickly if you plan to refrigerate the meat for later or freeze it. This is for food safety reasons. I know there are different opinions on chilling. Except for the safety issues, it’s best to experiment and do what works for you. Thanks for sharing your suggestions and point of view on this.
Although other methods of cooking meat would result in the meat continuing to cook after removing from the heat source, it is not the case with immersion cooking. The meat will never go beyond the temperature of the water bath, in this case 134 degrees f. The outside of the cut will, as you state, continue to increase in temp when searing.
Excellent. Comes out delicious every time. I make it in my electric pressure cooker with sous vide function. Thanks for that.
How interesting Juanita. Glad the recipe worked well. And thanks for leaving a comment!